VScode as IDE for STM32
Table of Contents
Why VScode?
ST micro provides an IDE for STM32 development called STM32CubeIDE. I have used STM32CubeIDE for some time, but after using VScode for some other projects it started to annoy me. STM32CubeIDE is certainly competent and powerful, but nobody will ever blame it for being fast and lightweight. On top of this, adding/using extensions is a bit clunky (the git plugin for example) so using VScode is a much improved experience in my opinion. When an upgrade to Ubuntu 24.04 on my main computer made it impossible to install STM32CubeIDE it was the final straw. I made the switch
Prerequisits
This guide will be written from the perspective of having access to these things
- A Ubuntu 24.04 system, but it should mostly work on a windows system as well
- A temporary windows or Ubuntu 22.04 system (as of september 2024)
- A ST-link V2 programmer
- An appropriate STM32 Target MCU. I am using a Nucleo-F103RB development board as an example here.
Install STM32 Code generation tools
This part is as of today a bit annoying and counterproductive. We need a tool called STM32CubeMX to easily generate some filed to kickstart development of the project. The code generation will set up all pin assignments, clocks, initialize peripherals and other useful things. Without it, it would take hours before a single "real" line of code can be written. The tool provide a graphical interface to fix all these settings. I guess you could do it manually, but if you know how to do this you will not be reading this guide anyway. ST is generally quite slow to support new releases of Ubuntu, and only LTS releases are officially supported. The delay is usually 6 - 12 months for support to be added. STM32CubeMX does at the time of writing support Ubuntu 24.04, but this problem will probably reappear when 25.04 or subsequent releases are released.
If you don't want to use Windows you can create a bootable USB disk from a supported release, preferably with persistent storage enabled, set up dualboot or use a small virtual machine. I have not tried a USB system it myself as I dual boot Windows. But you could probably follow this guide to create a Ubuntu 22.04 USB with persistent storage.
Boot into your OS of choice and download STM32CubeMX which can be found here. At the time of writing ST's site is a trainwreck so downloads might not work. One workaround is to download as guest with email adress. The emailed link should still work. I also had some success downloading with Firefox on my phone. YMMV.
Once downloaded extract the archive, install STM32CubeMX by running the executable/install script. In Ubuntu you probably need to add execute permissions before you install
sudo chmod +x ./<Extracted_folder>/executable
sudo ./<Extracted_folder>/Excecutable
Be careful when you scroll down the Licence text. The installer will quit if you scroll down "past" where you can accept/deny the terms. Not that you would do that as you of course read the full terms carefully before you install anything!
Create a project
Launch and choose MCU
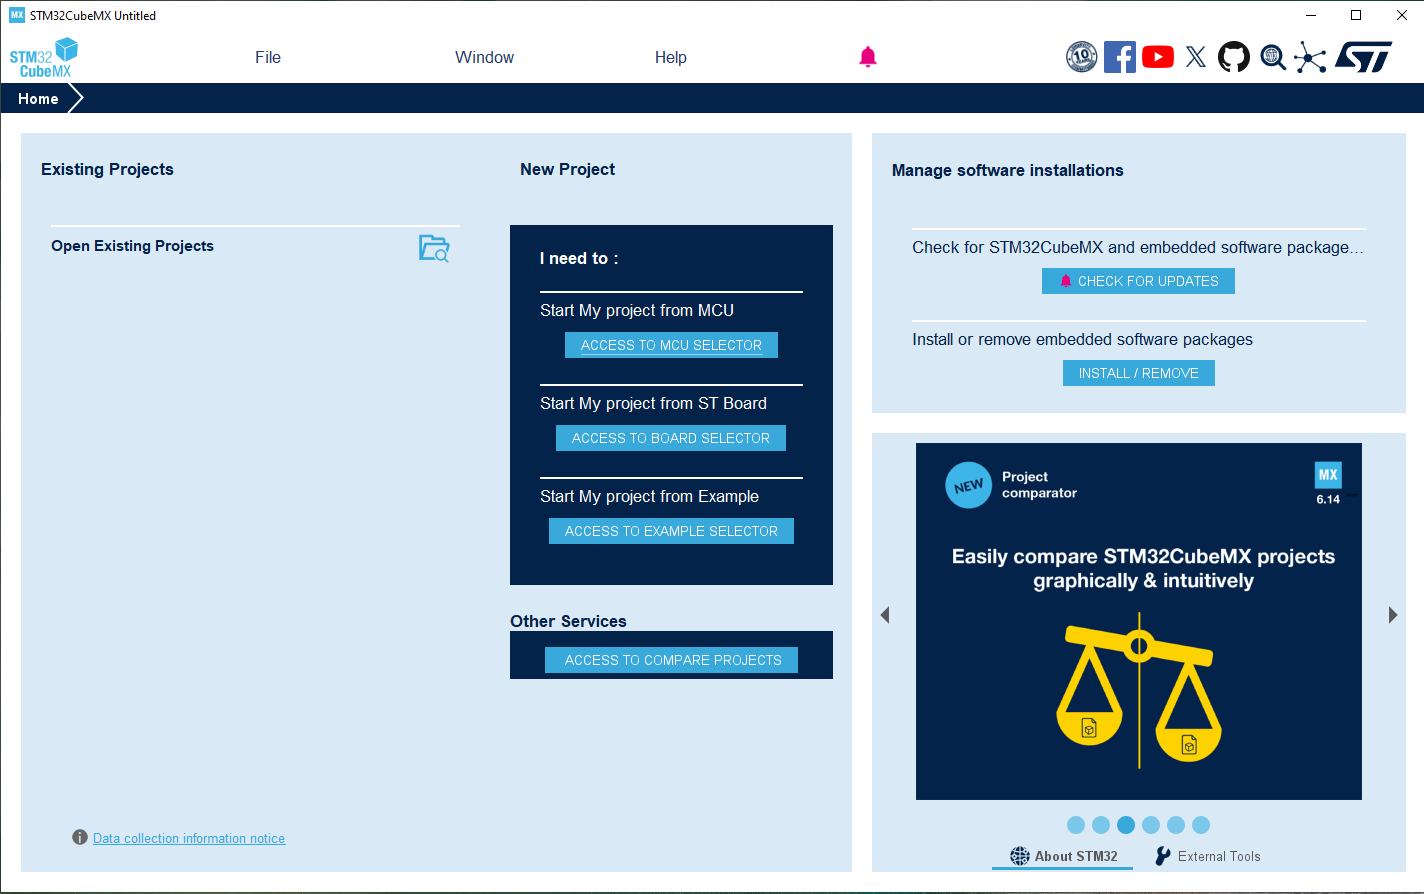
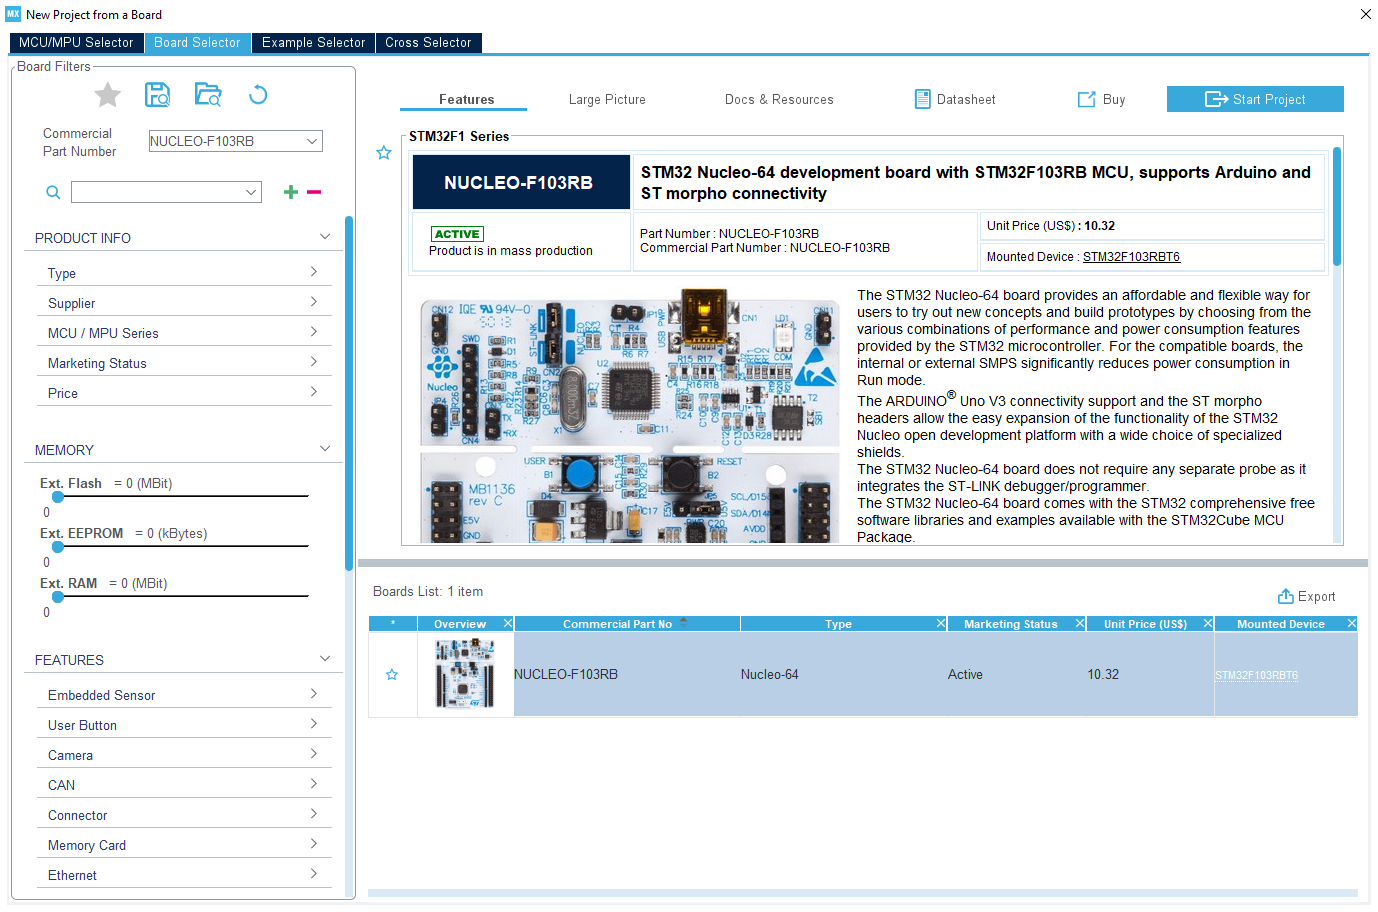
Once installed, launch STM32CubeMX. You will be met by the window shown below. Choose to start a new project and give it a name. Once opened you will be met by the MCU/Board selector. If you have bought a devboard from ST, enter its part number and you will get everything pre-filled for you. If not, find the name of the MCU and enter that partnumber into the MCU selector instead. Be careful to match the entire part number as you might get incorrect pinouts or flash memory parameters otherwise. Choose your MCU and start the project. I found my Nucleo board easily.
Configure toolchain and code generation
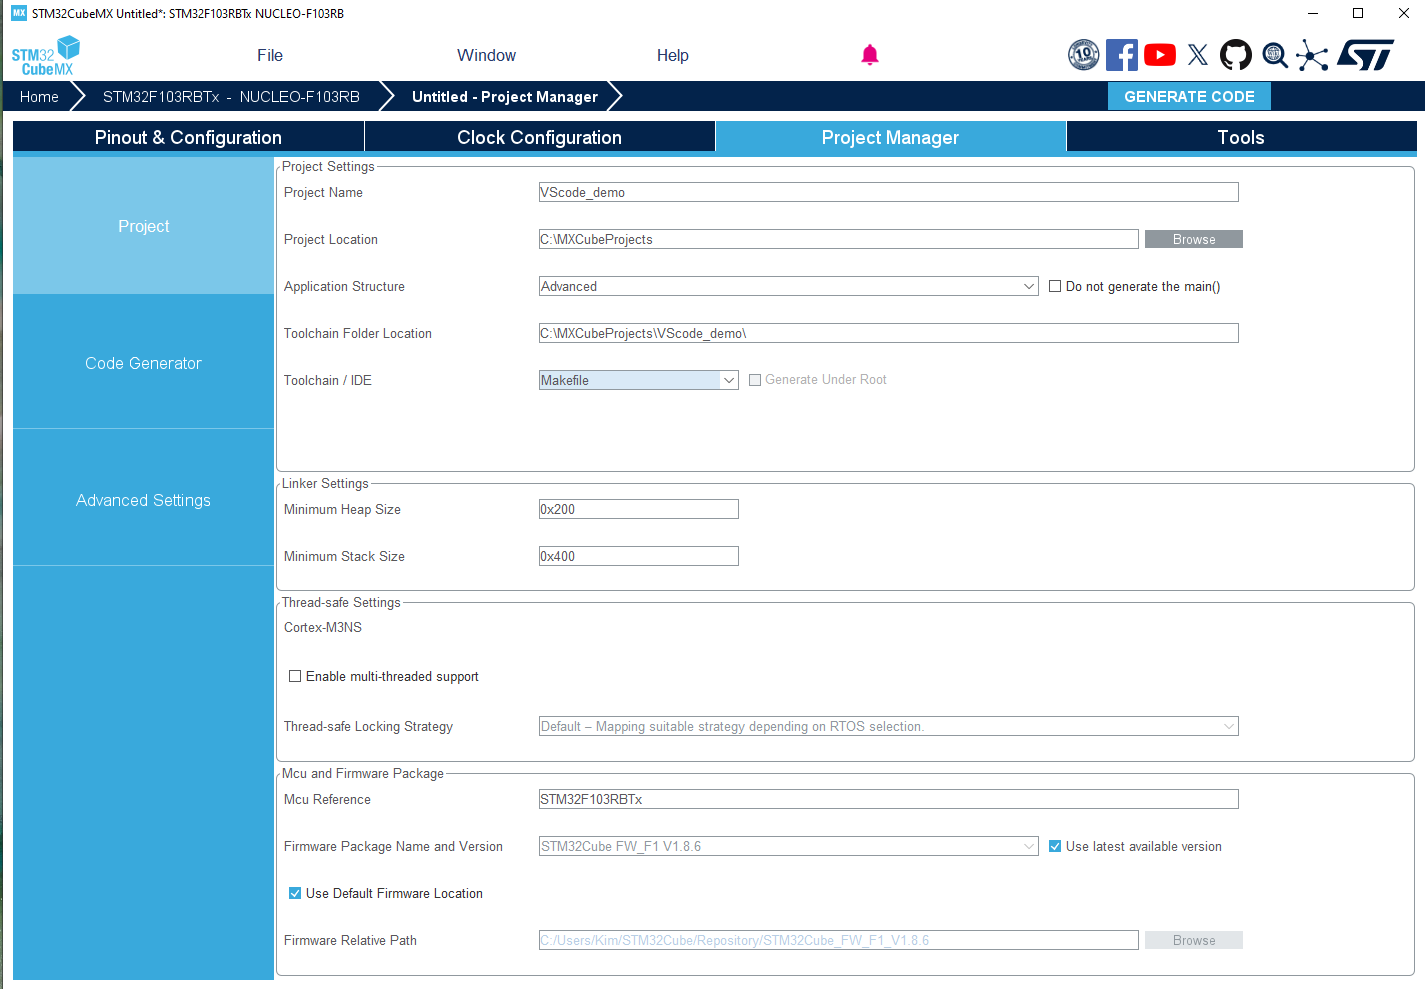
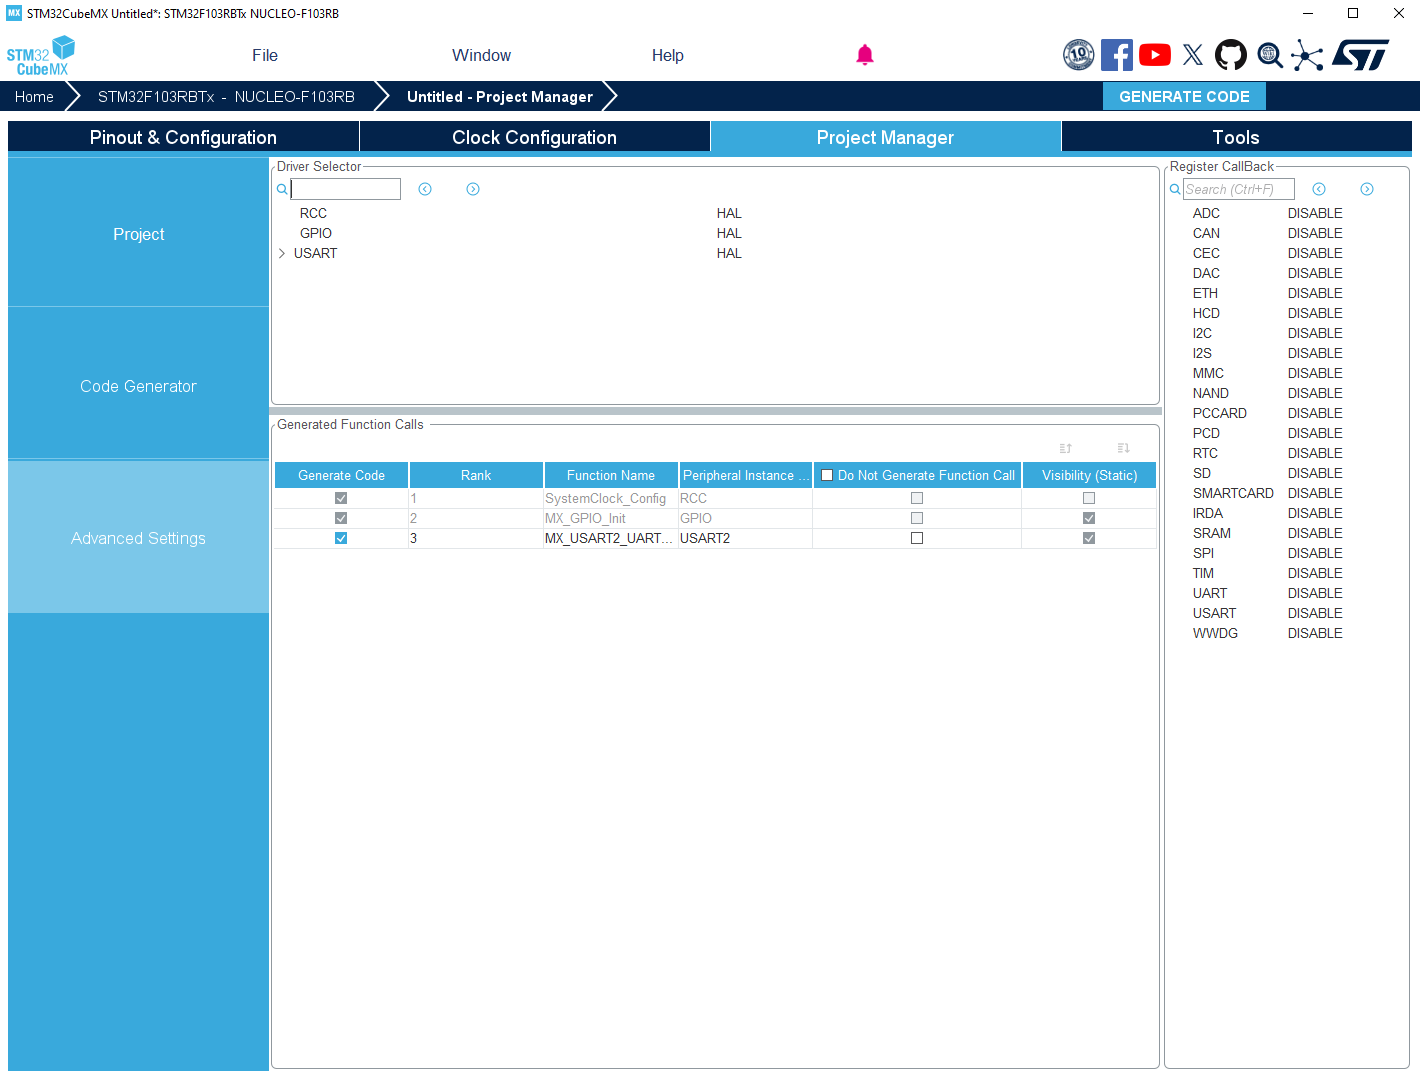
The default settings assumes you will use STM32CubeIDE. This need to change to something more generic to use VScode. Go to the "Project management" tab. Choose "Makefile" for "Toolchain/IDE". This is all you need to do specially for VScode support in STM32CubeMX
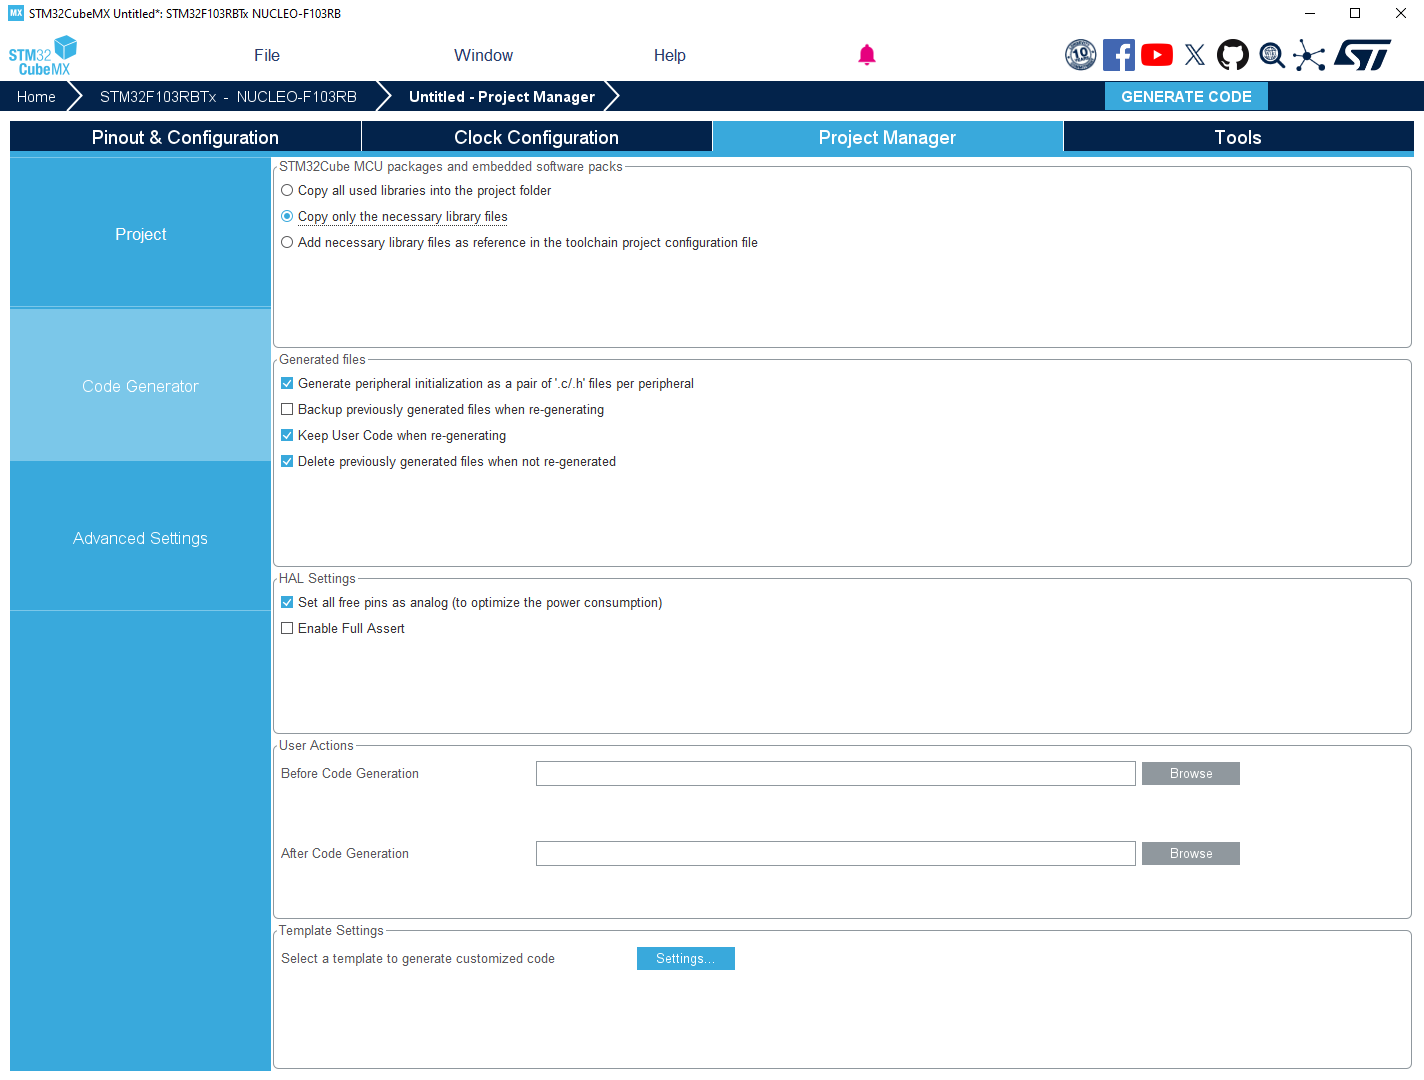
Now it is time to adjust settings for the code generation. Go to the code generation section by selecting the correct tab to the left. Here you can set some settings based on personal preference. I will always check the box "Generate peripheral initilization as a pair of c and h files per peripheral". This will split out the generated code into nice smaller files instead of dumping everything into a massive main.c. Now open the advanced section and make your choice between HAL and LL libraries. I am writing another article about what to choose here. For this guide, HAL is used.
Set up the clock and OI
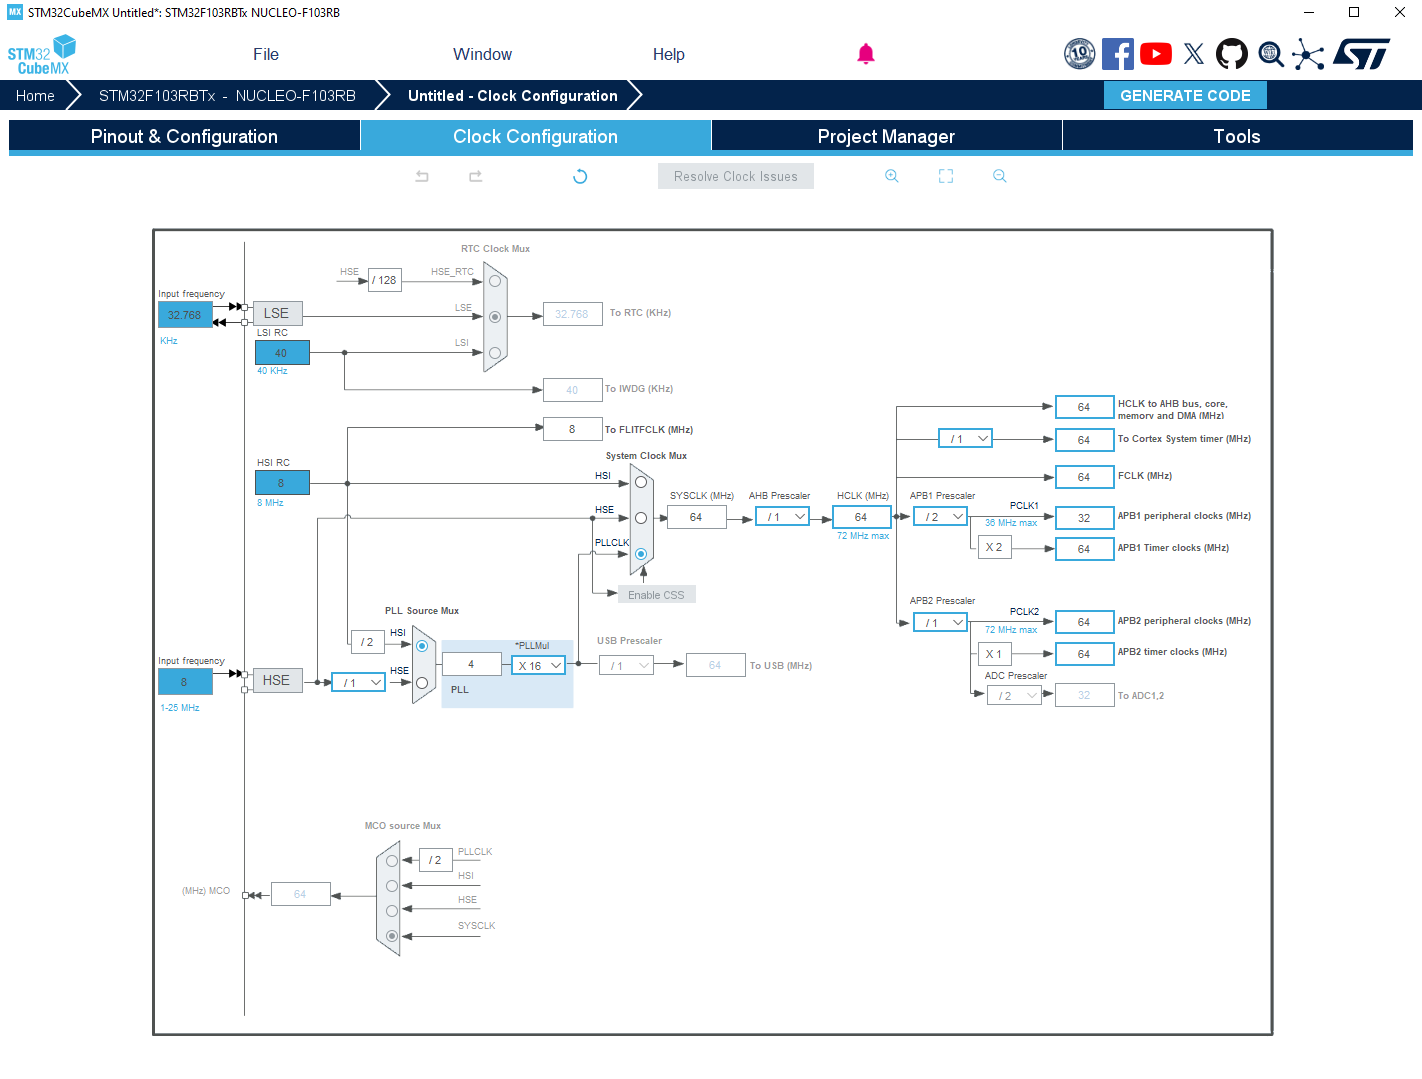
The next thing to do is to check the clock configuration tab. If you used a ST development board this is already filled in correctly. If not, you need to consult the design of your board. But there are basically two things you need to know
- What, if any, external oscillator does my board have?
- What is the clock speed of the MCU?
If you have an external oscillator, choose HSE as the clock source and enter its frequency. Then you need to fiddle around with the PLE/system clock mux settings to get the core frequencies you want. If you do not have an external oscillator, choose the HSI clock as source and do the same exercise with the clock settings. The goal is to have your chosen clockspeed to all the parts of the MCU on the right, except for any limitations forcing other frequencies for some peripheral. Your chosen clockspeed is typical the rated in the datasheet but you can underclock for lower energy consumption if you do not need the extra performance. STM32CubeMX will also tell you if a clockspeed is to high, and what the "default" should be.
Now open the pinout and configuration tab. Here you can see all the MCU pins. A drop-down menu will open to show everything that pin could do when you click on it. Again, ST development board will have some pins pre-filled in green to reflect how the board is built. There are no right answers how to assign pins here. It will be up to what you want to do. I recommend to right-click and enter a user label with a more human friendly pin name when you have assigned it. On a small processor board it might be the pin name, or what you call the signal in hardware schematics. As an example here I will rename PA5 to DO_LEDas that is how the development board form ST is set up. This label can be used to refer to the pin when writing software.

Generate some code
You should now be ready to press "generate code". Once the operation finalises after a few seconds you should now have some code to start developing with. If you are on a temp OS, copy the entire project folder to external storage and launch your OS of choice
Install VScode
This is the easy part. Install VScode by going to Microsoft's website and download the install file. Open it with software center for a GUI install by right clicking or in a Terminalsudo apt install ./<installer>
Once VScode is installed install the following extensions
- C/C++
- CMake
- CMake tools
Your VScode install should now be complete and ready for use! There are more things to install to actually be able to compile and debug. Compileing requires the compiler and some extra tool packages. Install them all from the terminal
sudo apt-get install libtool build-essential gcc-arm-none-eabi
The arm compiler is sometimes changing name slightly what I have seen, so it can be a bit fiddly to find. I explain more about the packages in the article about compile and debug with VScode that can be found here.
Start development with VScode
Launch VScode and open the project folder as a new workspace. You should find this folder structure
Core/Src
Core/Inc
Drivers
If there is no .vscode folder, create one. The VScode folder need a c_cpp_properties.json and a settings.json file to set up the environment correctly. I am using the templates below, adapt them to your environment
c_cpp_properties.json
{"configurations": [{"name": "Linux","includePath": ["${workspaceFolder}/**"],"defines": ["stm32f103xb"],"compilerPath": "/usr/bin/gcc","cStandard": "gnu17","cppStandard": "gnu++14","intelliSenseMode": "linux-gcc-x64","configurationProvider": "ms-vscode.makefile-tools"}],"version": 4}
settings.json
{"cmake.configureEnvironment": {"GCC-PATH": "/usr/bin/gcc"},"files.associations": {"*.c": "c","*.h":"h"},"makefile.launchConfigurations": [{"cwd": "<path_to_workspace>/build","binaryPath": "${workspaceFolder}/build/<excecutable>.elf","binaryArgs": []}],"cortex-debug.gdbPath": "gdb-multiarch","makefile.extensionOutputFolder": "./.vscode"}
Once these things are set up you should be ready to write your first code. One thing that is very important to remember is to respect the comments guarding your code from being deleted. STM32CubeMX will overwrite most of the files each time "generate code" is pressed. The exception is whatever is written between lines that looks like this
/* USER CODE BEGIN 0 *//* USER CODE END 0 */
Write a simple blink example. Add this at the top of the main function in main.c
/* USER CODE BEGIN 0 */uint32_t last_time = 0;
/* USER CODE END 0 */
And around the while(1) loop
/* USER CODE BEGIN WHILE */while (1){if( ( HAL_GetTick() - last_time ) > 1000 )
{
HAL_GPIO_TogglePin(DO_LED_GPIO_Port, DO_LED_PIN);
last_time = HAL_GetTick();
}/* USER CODE END WHILE *//* USER CODE BEGIN 3 */}/* USER CODE END 3 */