How to hand solder for beginners
Introduction
This post will teach you how to hand solder with a soldering iron. I will cover several types of soldering; Through hole components, Surface mount components and cables. The guide is aimed at people who are very new to soldering. I expect you to basically have an iron, some components and the will to start.
Table of Contents
What is soldering?
So lets start at the absolute beginning. What is soldering, why do we do it and how does it work?
What is soldering?
Soldering is a process where two metal parts are mated by melting a material around the parts to be mated. The added material is called solder and has a lower melting point compared to the parts to be mated. The base metals are never in the liquid phase during the process. It is instead only the solder that flows into the joint, adheres to the base materials and solidifies to form a joint. This adhesion is very important and is what you often see called wetting when talking about soldering.
Soldering is not limited to electronics manufacturing. Copper piping is often soldered, and you can see it being used where welding is not possible for some reason, for example on cast iron, some specialised steels and brass
What materials are needed?
Soldering is a quite cheap assembly method that can easily be done in a non-workshop environment. You need at minimum these things
- A soldering iron
- Solder
- Parts to solder
It is also very helpful to have access to these things
- Flux
- "Third hand"
- Tip cleaning equipment
- A soldering iron stand
- Magnifying glass
The soldering iron
This is obviously the most important tool in your soldering toolbox. The iron is a quite basic tool with a handle, a tip that gets hot and in most cases a power cable. You can (and I have) solder with a very cheap and basic iron without to much trouble. A cheap iron will cost you maybe 10 Euro. What you compromise on with a cheap iron is
- Time to heat up. A cheap iron usually takes minutes to get warm
- Annoying cables. The cheap PVC coard is stiff and ALWAYS in the way
- Changing tips is impractical
- No temperature control
I personally started with a basic soldering station that I bought at a local hardware/hobby store for maybe 35 Euros. It has a built in stand, an alleged temperature control and a sponge for tip cleaning. It served me well for some years and I would say something like it works for a beginner. It can probably be found cheaper now, or with better temperature control at the same pricepoint.
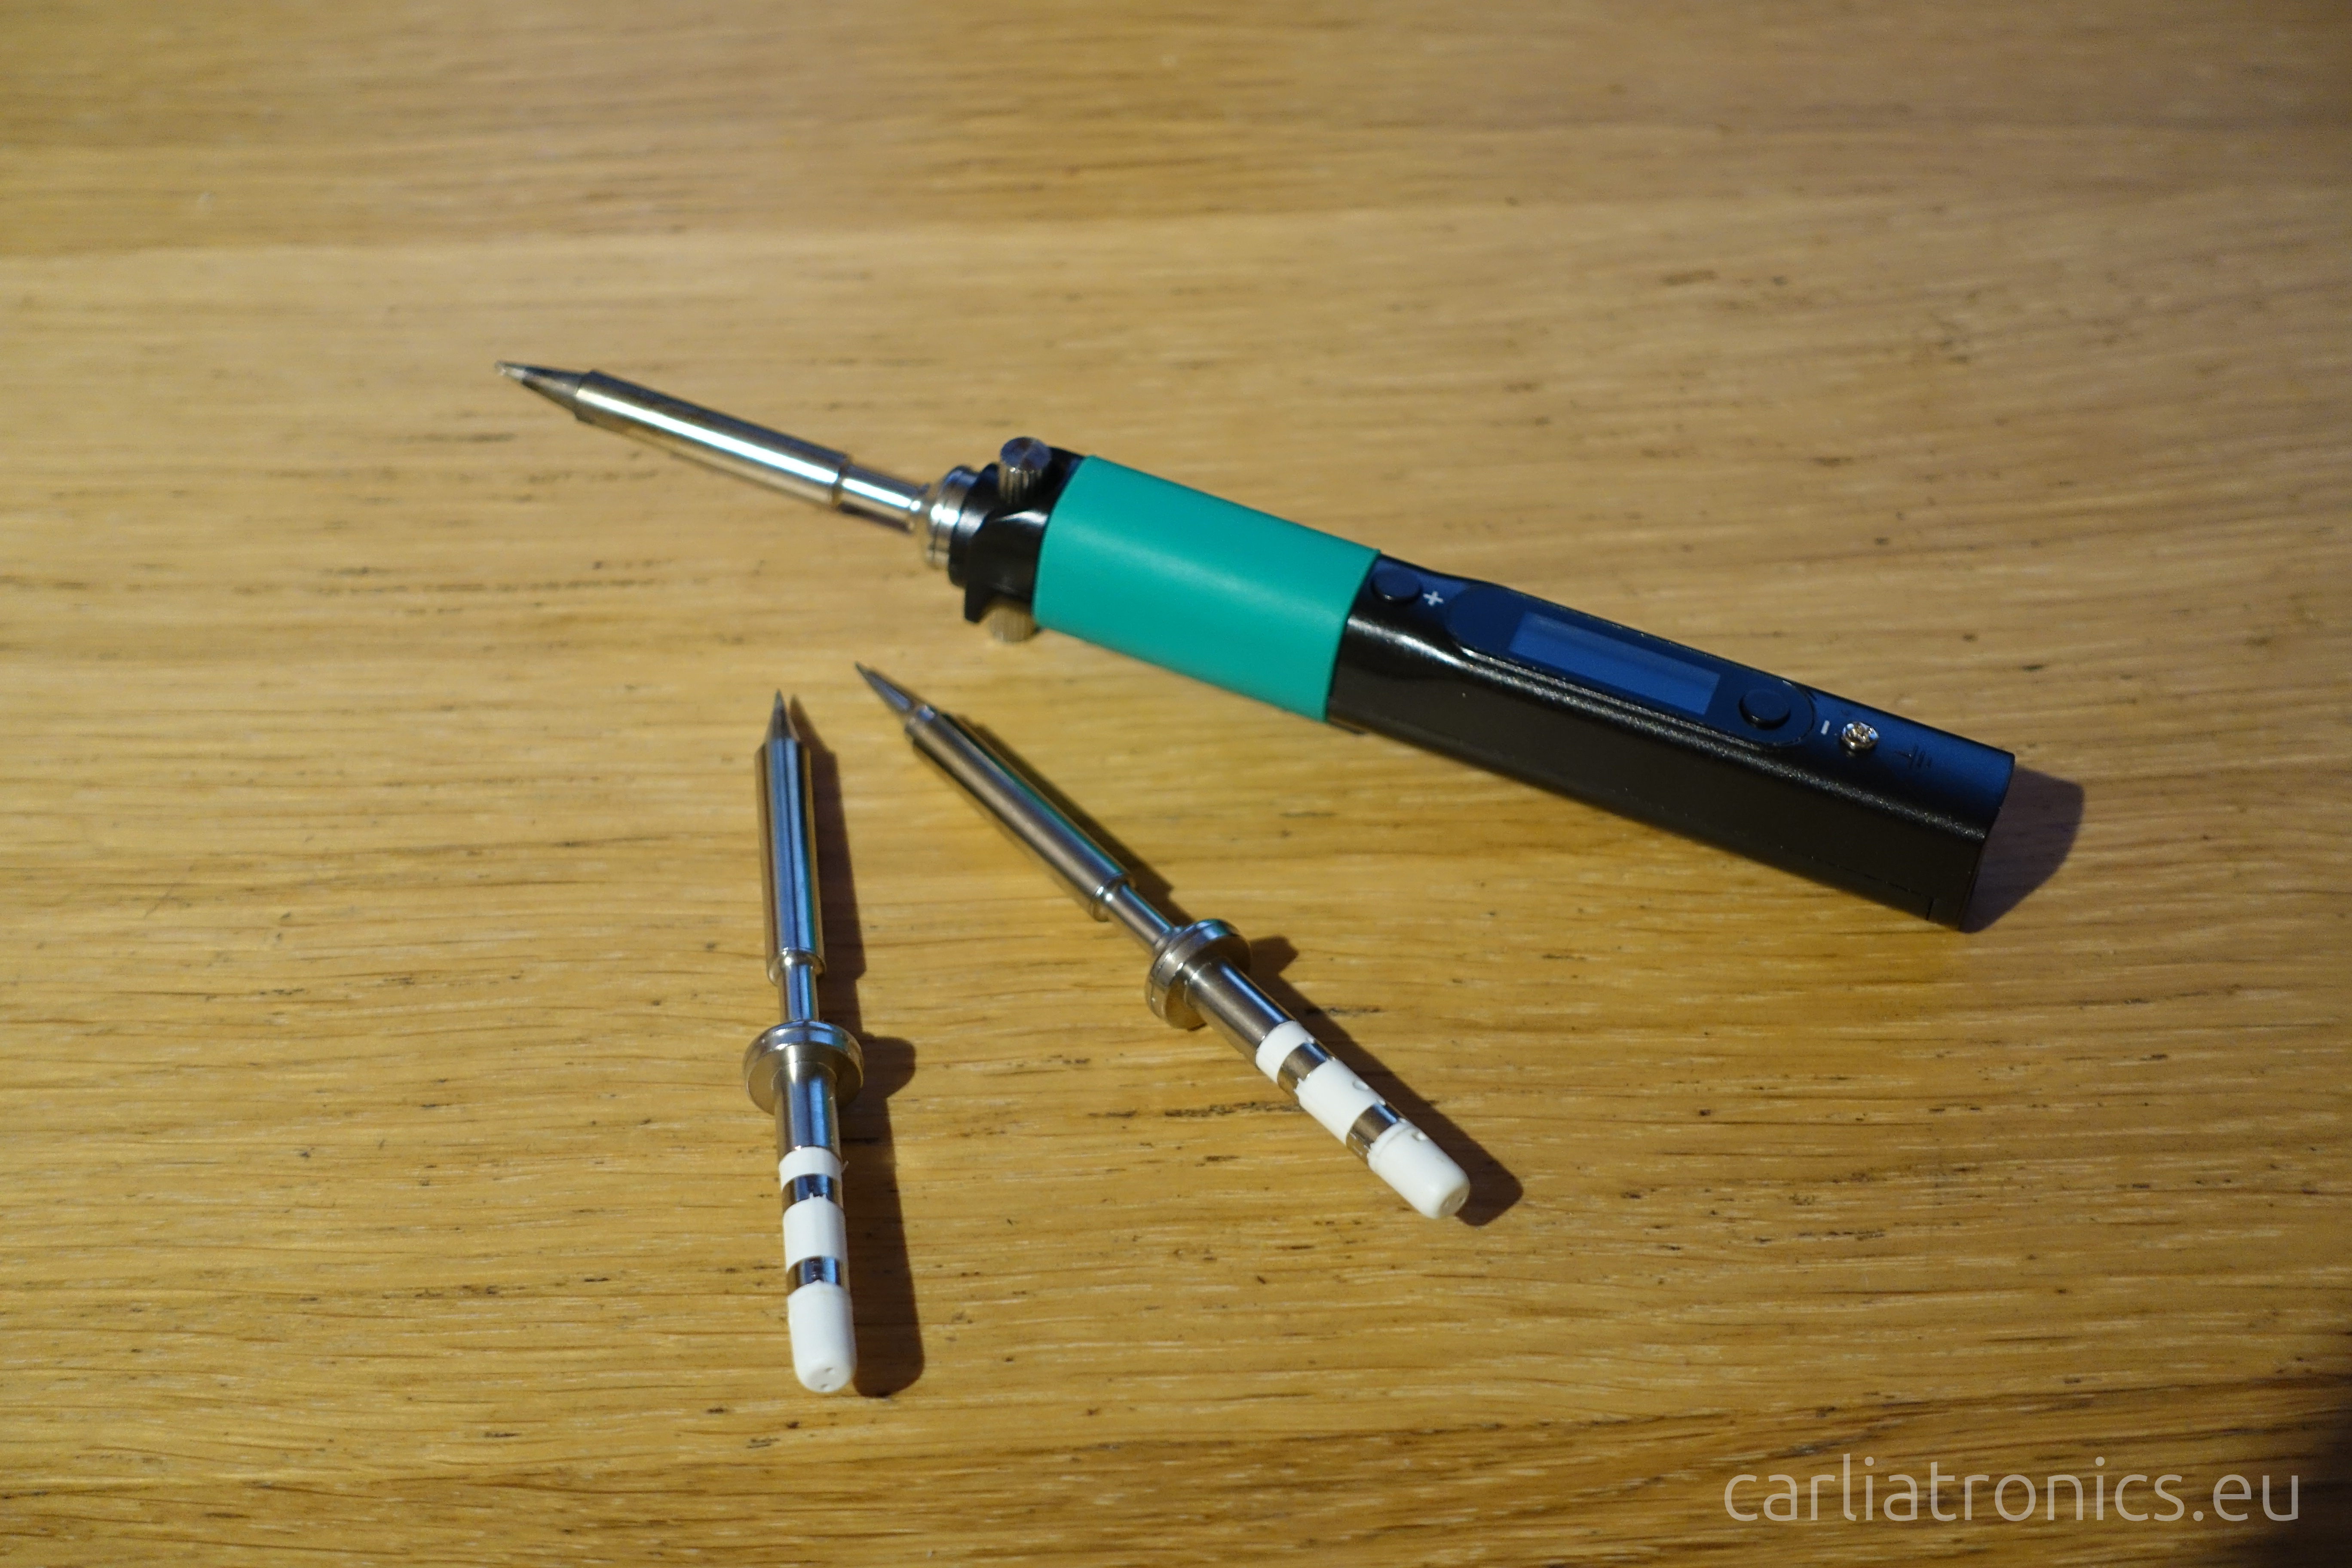
I have since upgraded to a pinecil. The pinecil is a smart iron developed by pine64. It is a "clone" of the TS100 which is a very popular iron, but at about 1/3 the price. Pricing differs if you buy it directly from Hong Kong or from a distributor in Europe. I did the expensive thing and paid around 45 Euros for it and an additional 45 Euros for a set of tips while importing from Hong Kong will cost you $25 for the iron. Please note that the iron require you to bring a separate power supply on top of this cost. The recommended way is a USB-C powersupply with at least 65W of power or a 24V DC plug. So what do you get for 2 - 3 times the cost of the basic unit i bough years ago? Well you get
- Much higher power
- Fast warmup, under 10s to 350C
- Proper temperature control
- Easier tip swap
I found the upgrade well worth the money. I might write something about the iron at some point, but for now you can Google for it if you are curious.
Solder
The solder is the next important thing you need. Solder can be described the easy or the hard way, but I stick with easy for now. There are two kinds of solder you need to know about. Lead free, and leaded solder.
Leaded solder
Leaded solder was the standard solder for basically forever and I would recommend it for a beginner if you can find it. It is not legal to use in new commercial designs in Europe for some years so it can be slightly harder to find here. It has a melting point of around 180C and is therefore very nice to work with. You mostly find it with flux inside it (flux core, Rosin Core) and this is what you need. Non-flux solder will be a pain to use.
Lead free solder
Lead free solder is as the name suggest alloys without lead in it. There are several different alloys but for our purposes we can lump them together as "lead free". You also need to buy this with flux inside it. The lead-free solder melts at a higher temperature, around 230 - 250C depending on alloy. It is slightly harder to work with and the risk of damaging boards or components are increased due to the higher temperature. That being said, it is absolutely not an impossibility to do.
Flux
I left flux out from the list of required materials as any solder you buy in a consumer facing store will almost 100% sure be "flux core", meaning it has flux in it. Because of this you do not strictly need extra flux.
However, flux is required for soldering, without it it will be impossible to properly wet the parts. The purpose of flux is to clean and strip the oxide layer of the base metals to allow the solder to adhere to it. If you use fluxed solder you generally do not need to care about having extra, but it never hurts to use. Flux makes everything so much easier. You can deplete the flux by heating a joint for to long or have base metals that are excessively oxidised. You will notice by the fact that the solder melts and form a drop that will not flow along the surface.
Flux can be bought as pens, in syringes or in cans/jars. I personally prefer the syringe stuff but pens work good as well. I never tried in a jar and I would not do it as you need some tool to apply it, like a brush or spray. There are a lot of things that could be said about flux, but that might be a story for another time.
Tip cleaning equipment
I was considering to place this is the "required" list as well, but as it is not a strict requirement I kept it in the second list. Your tip will become dirty, mostly by flux residues that adheres to it. It can be seen as an ugly brown smear on the tip. Cleaning the tip get rid of this and other debris for better heat transfer and solder adherence. It will also make sure the tip does not corrode over time. Tip cleaning is generally done by two methods.
Wet sponge
A sponge you need to pour water over commonly supplied with cheap soldering stations. It is common as it is cheap and technically work. You clean the tip by dragging it along the sponge. Old solder and flux will stick to the sponge, and the water makes the sponge soft and prevents it from charring.
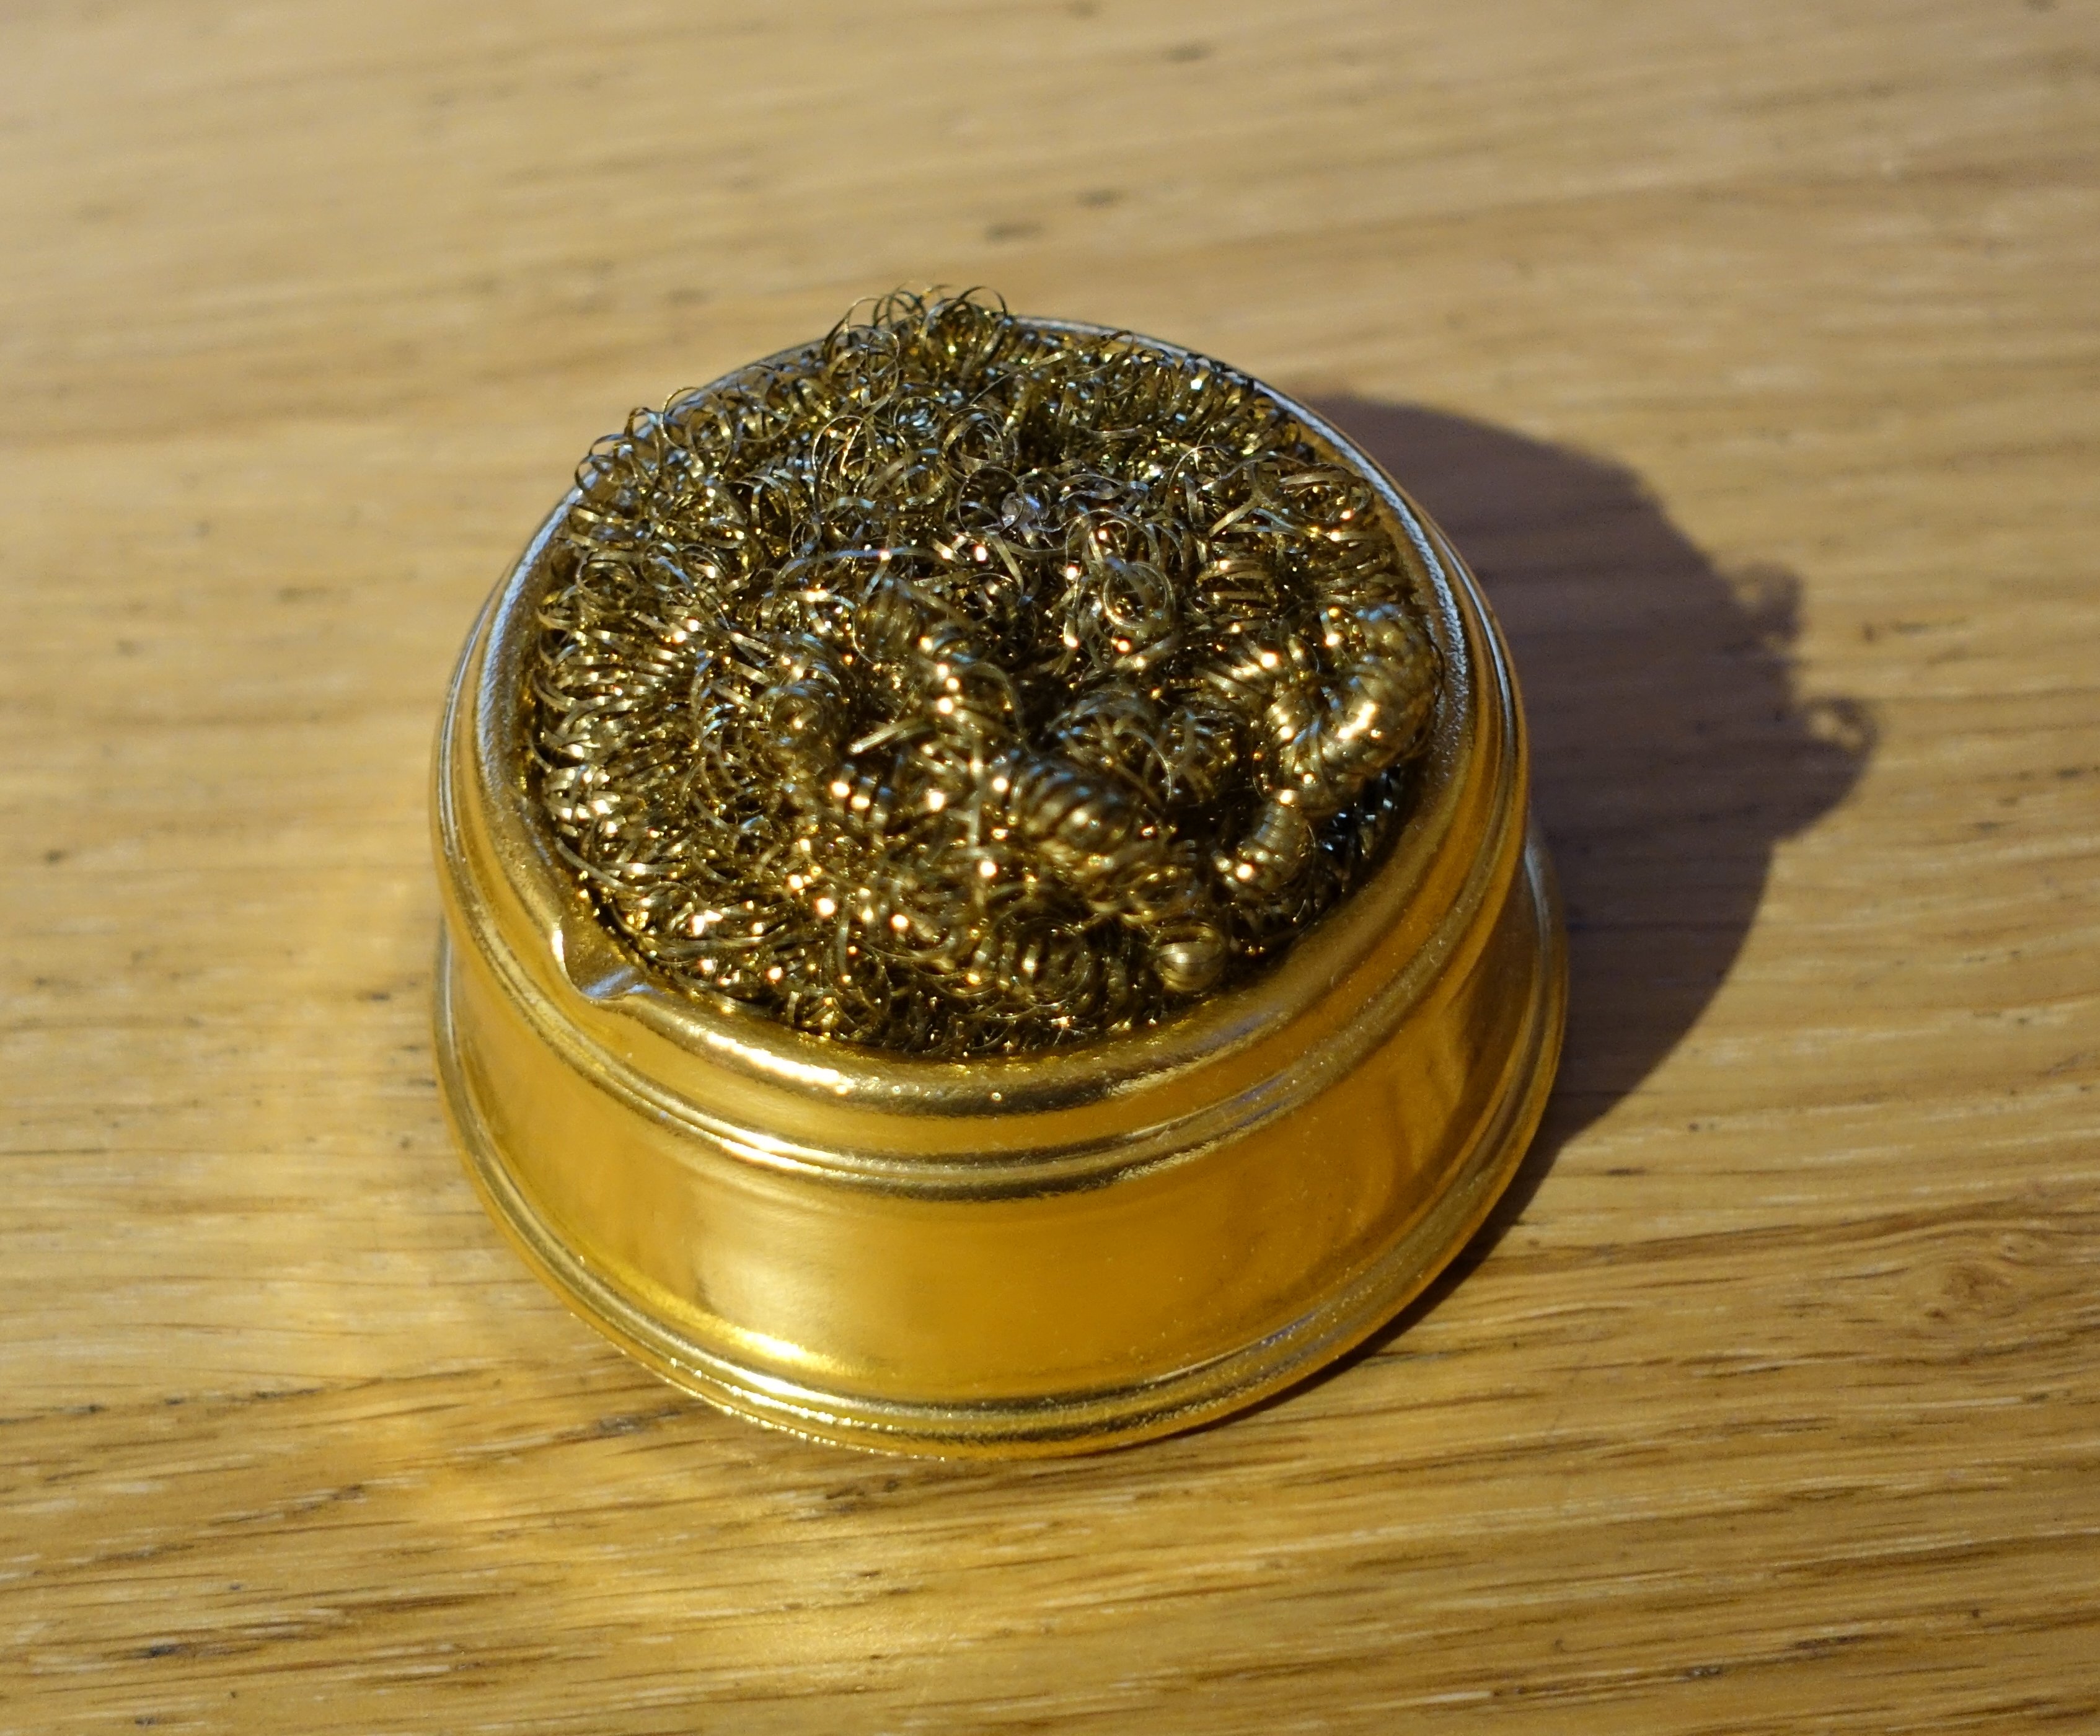
Brass wool
Brass wool is the next thing you will find. The process is the same but without water. Using brass wool is much more effective and probably better for your tips but is more expensive. I tried brass wool at work and I never want to use a sponge again, so I would recommend splurging the few dollars it cost if you plan to solder more than a few times.
The rest
I will lump the rest into one category as they are usually sold together. A third hand is a tool to grip parts and keep them steady during assembly. It is pretty nice to have as your hands are usually busy with iron and solder wire. Most cheap third hands you find are also equipped with magnifying glasses. The price of these vary as much as the quality does. If you buy a pinecil, get yourself a stand as well. It is a nice way to store it and it will save your desk/your hands from scourge marks.
How do you solder?
Soldering is pretty easy once you get a hang of it. I usually see beginners struggle as some steps are not properly explained. Once that is pointed out you see them solder small SMT stuff within the hour.
The most important thing is heat management. This is very most beginners struggle. The base metals must be heated to the liquid temperature of the solder for it to start flowing, and it will not flow onto material that is too cold no matter how much you try. The other side of this coin is that it will spread out evenly on any wettable surface whether you like it or not. As metals are good heat conductors this can be surprisingly hard to manage. Lets pretend we are going to solder this pin header into a through hole pad. How would we do it?
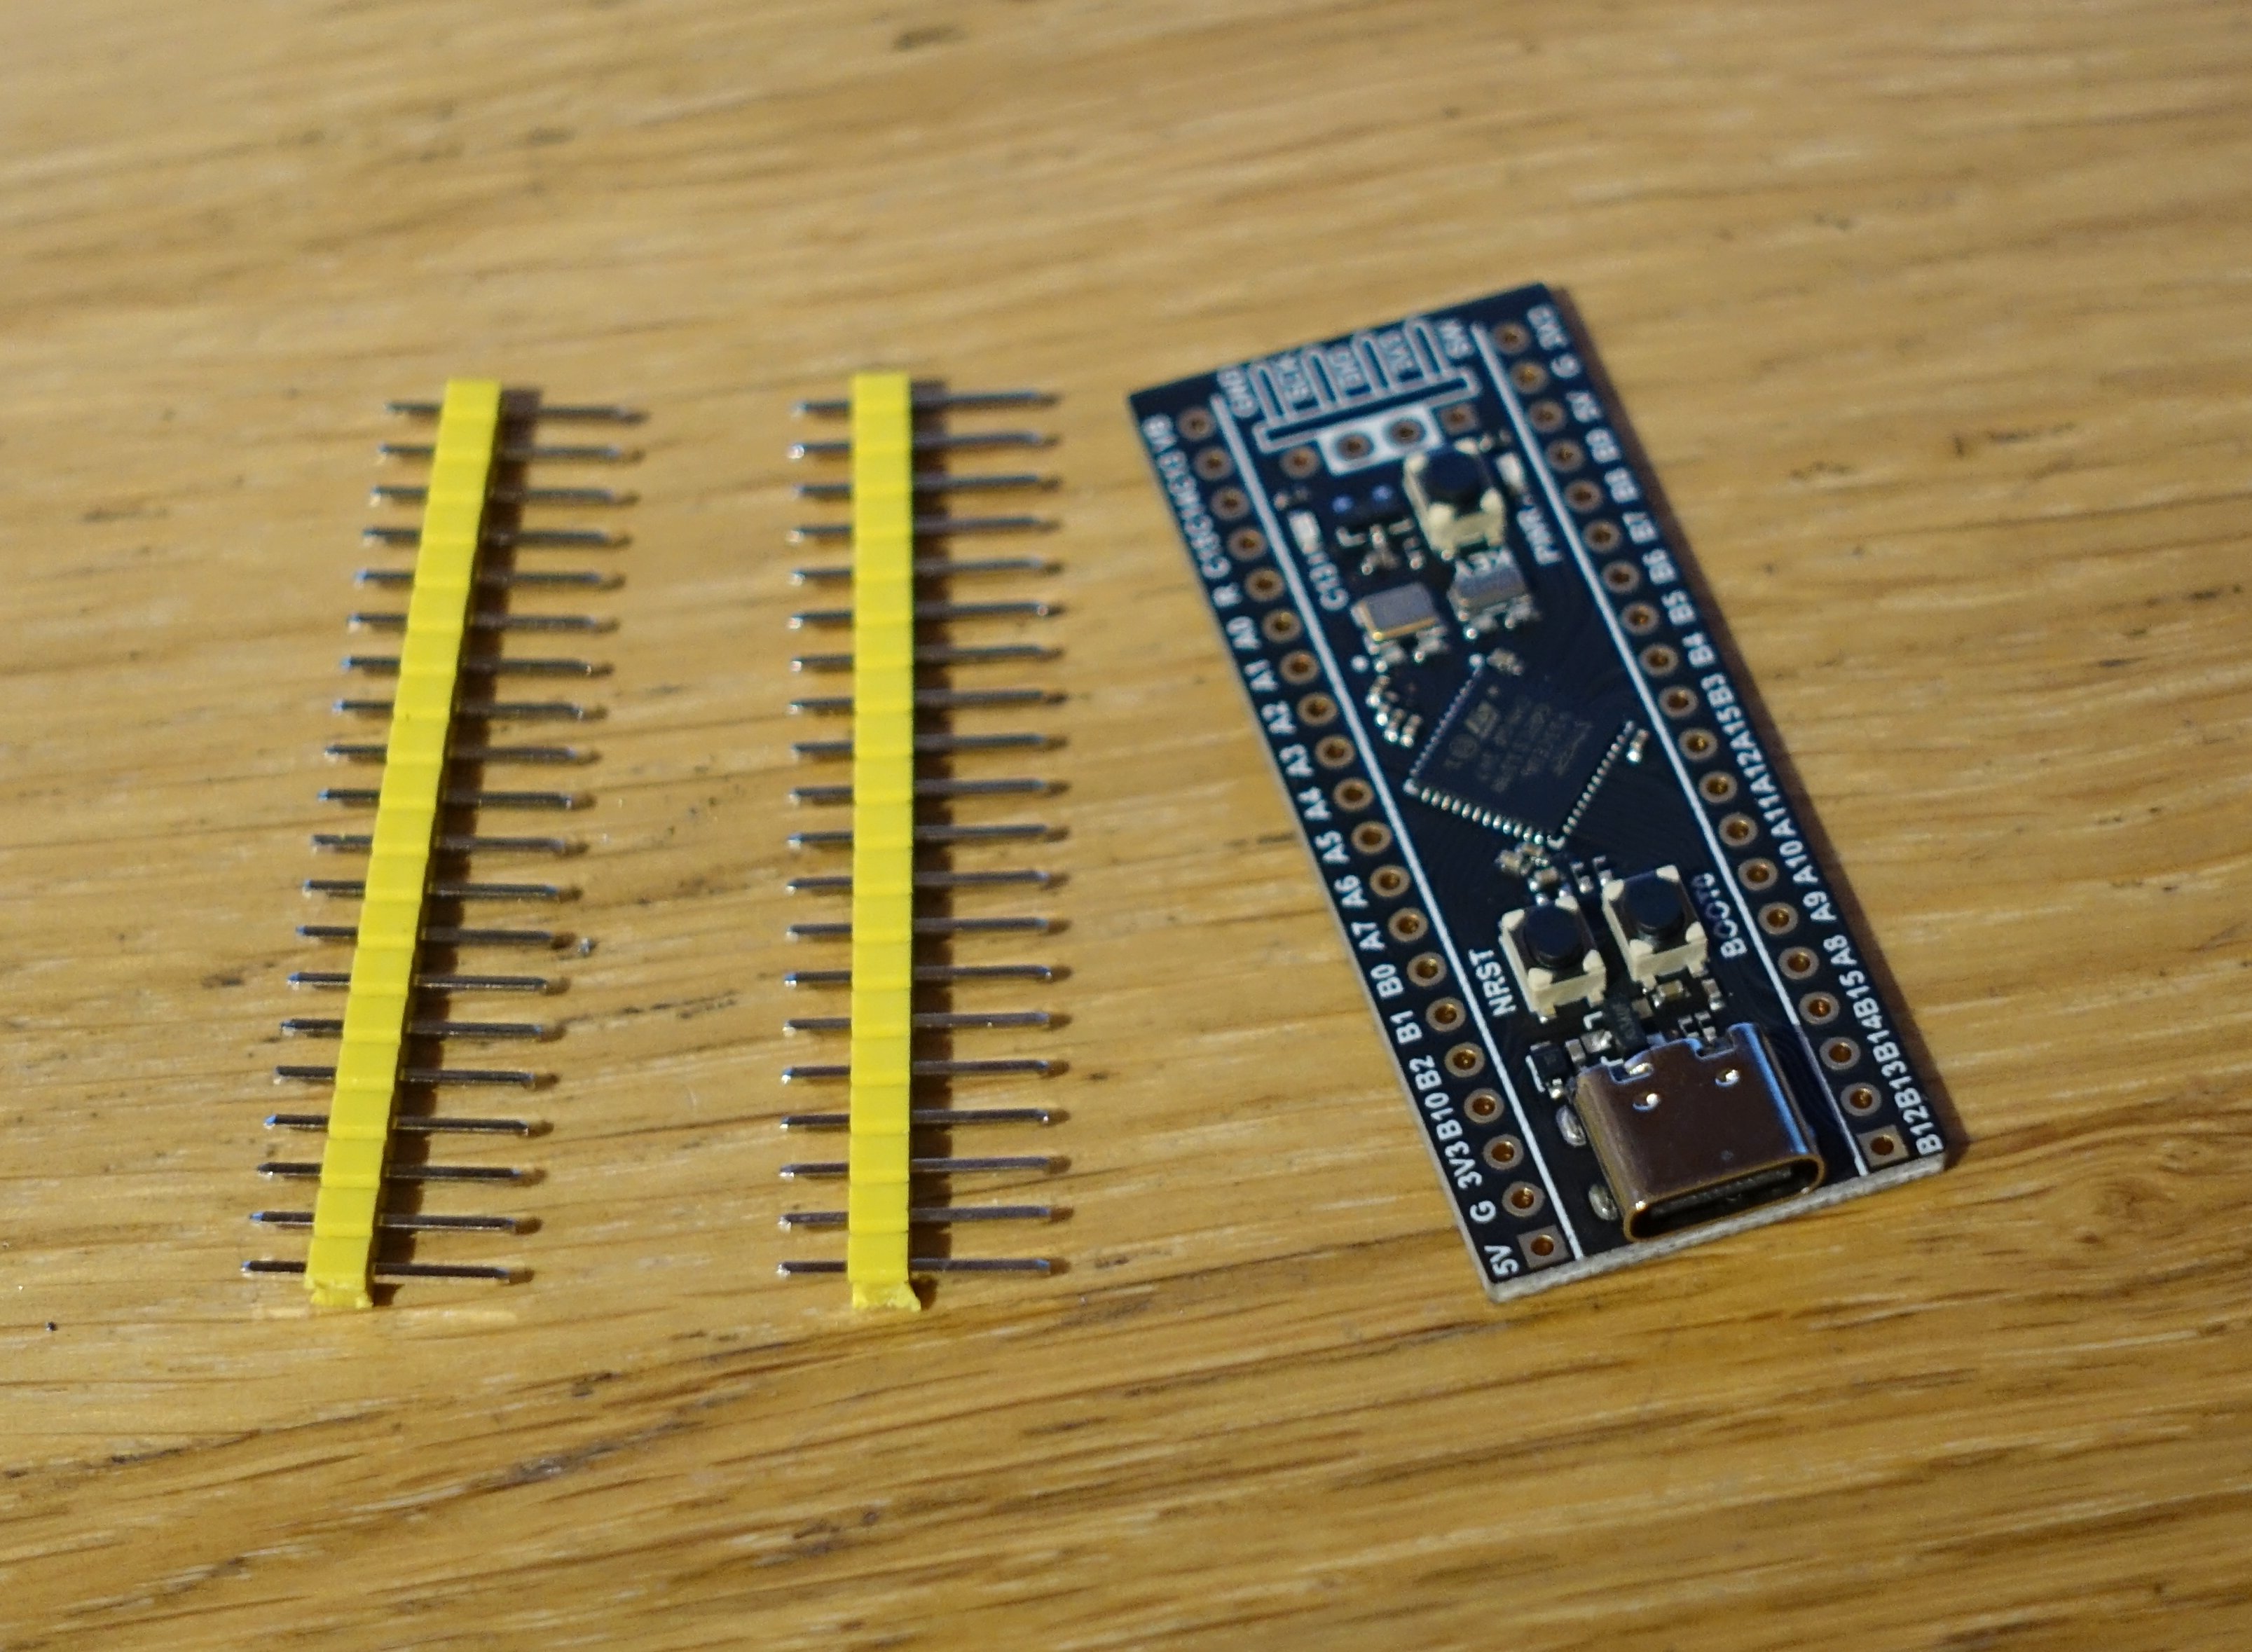
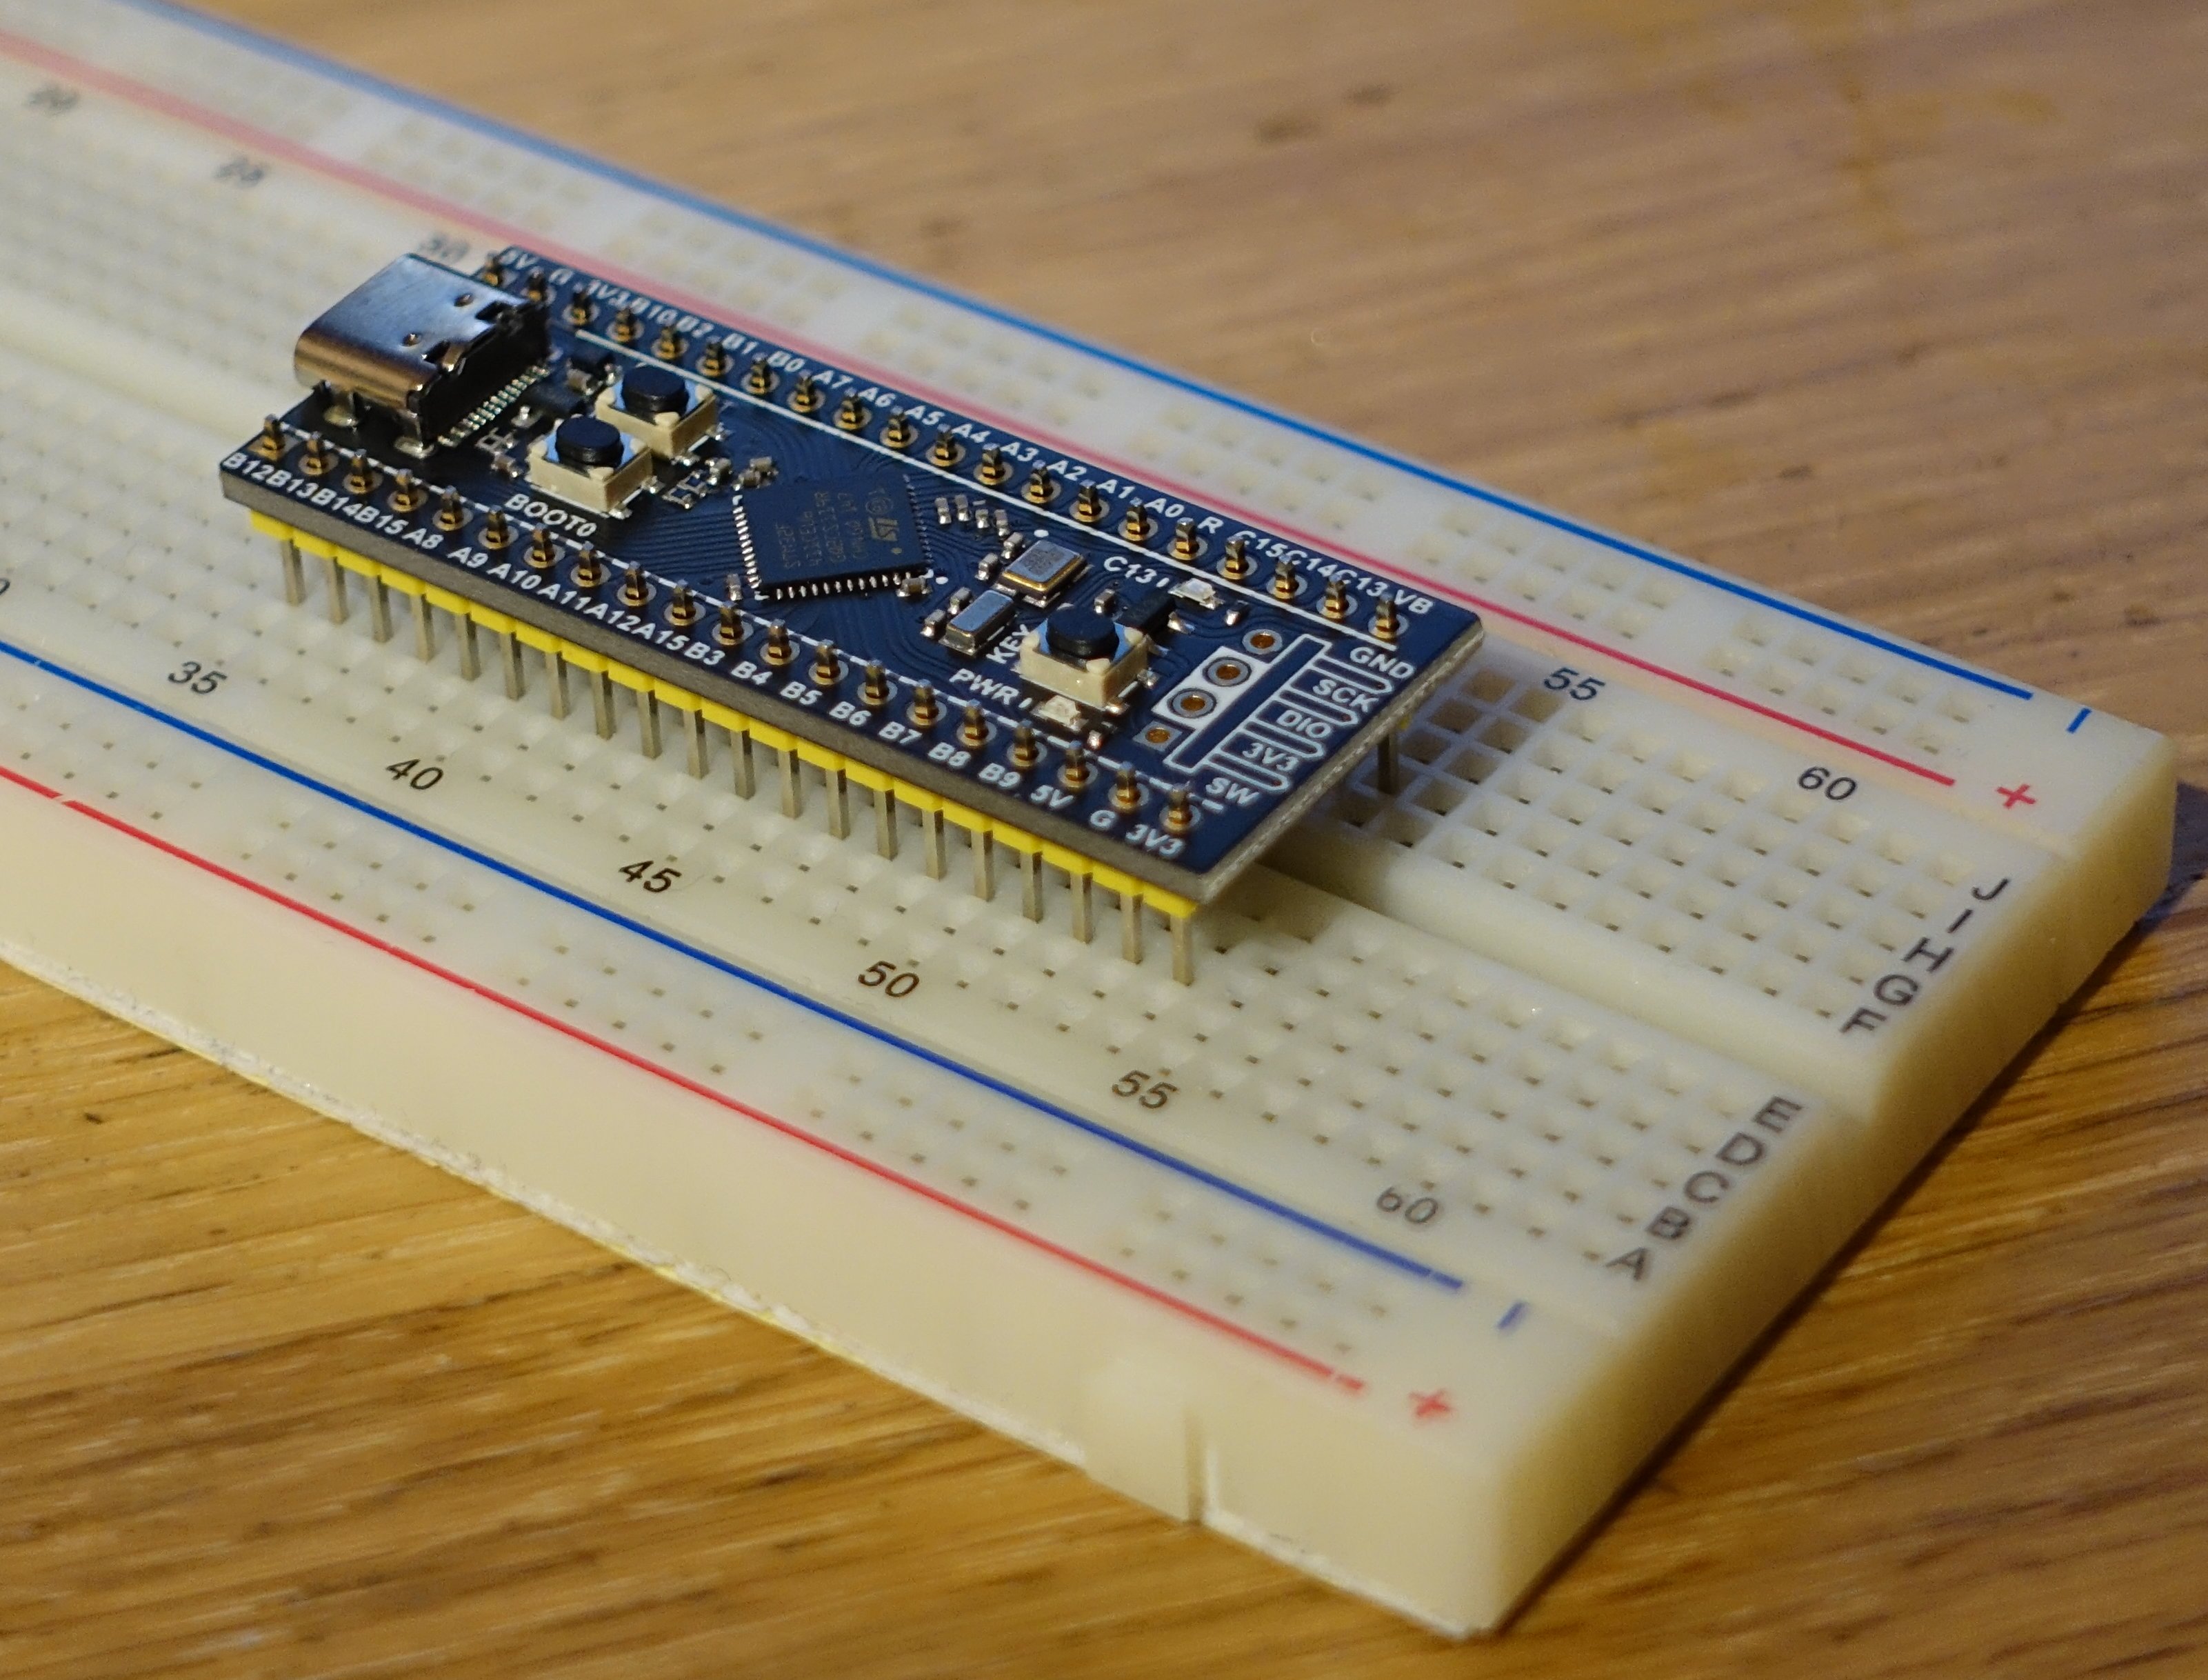
Step 1: Secure the parts
Secure the part in the correct position. For a pin header the easiest might be to use a breadboard. Insert the header into the breadboard and place your PCB on top. If not possible you can also use tape, third hands or something else to pinch it it place.
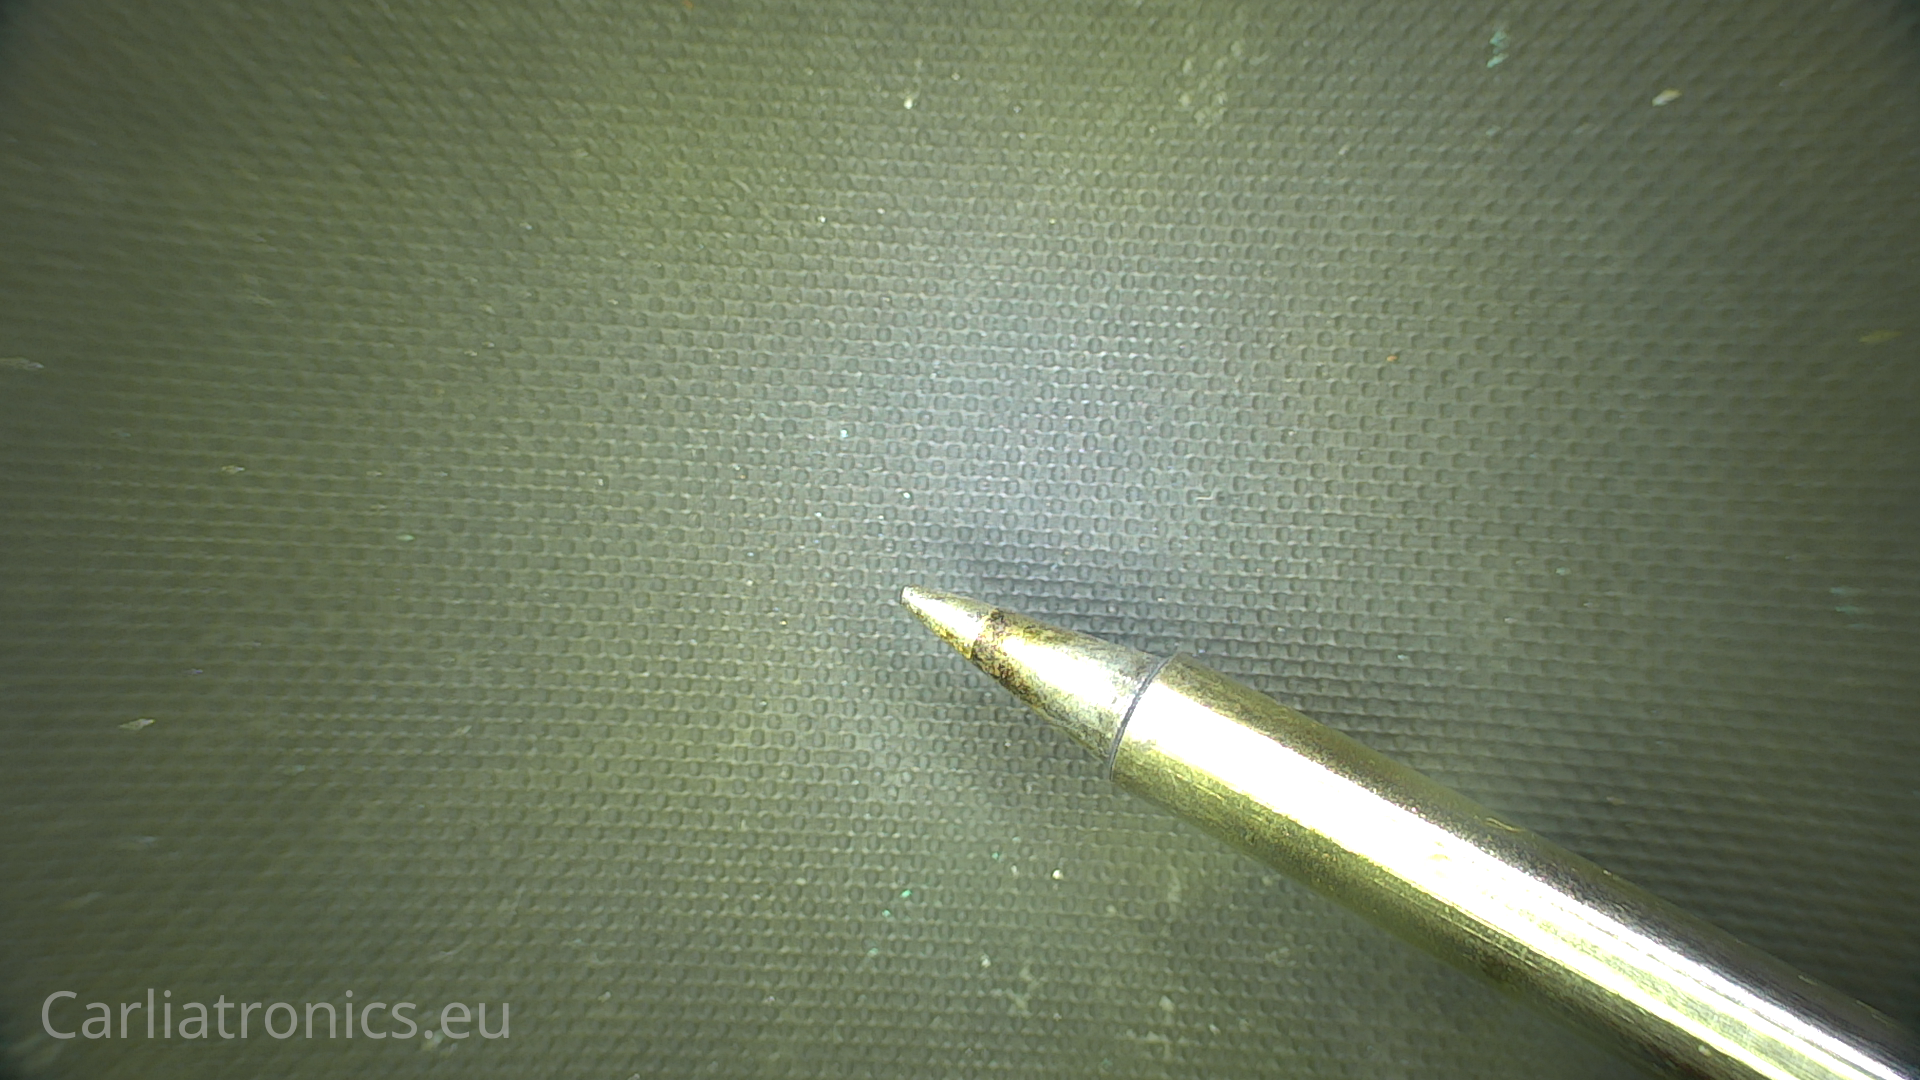
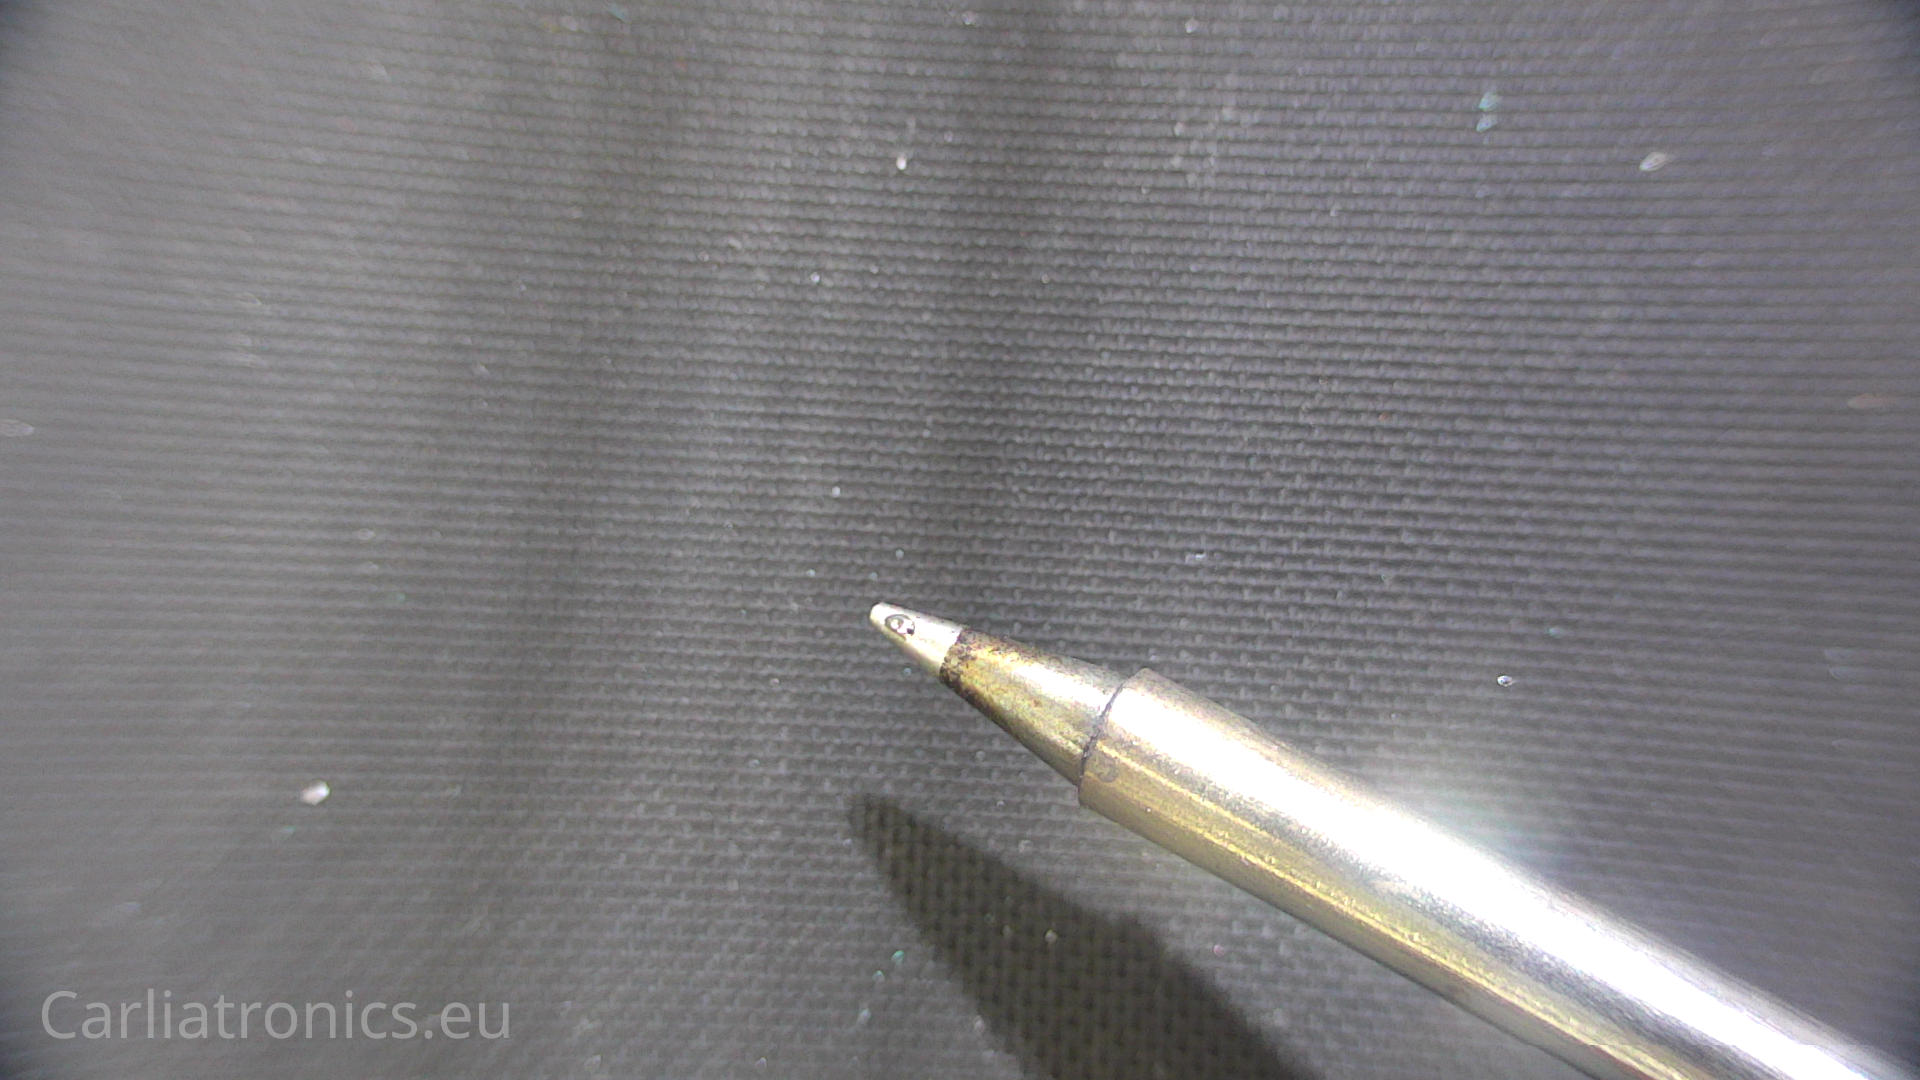
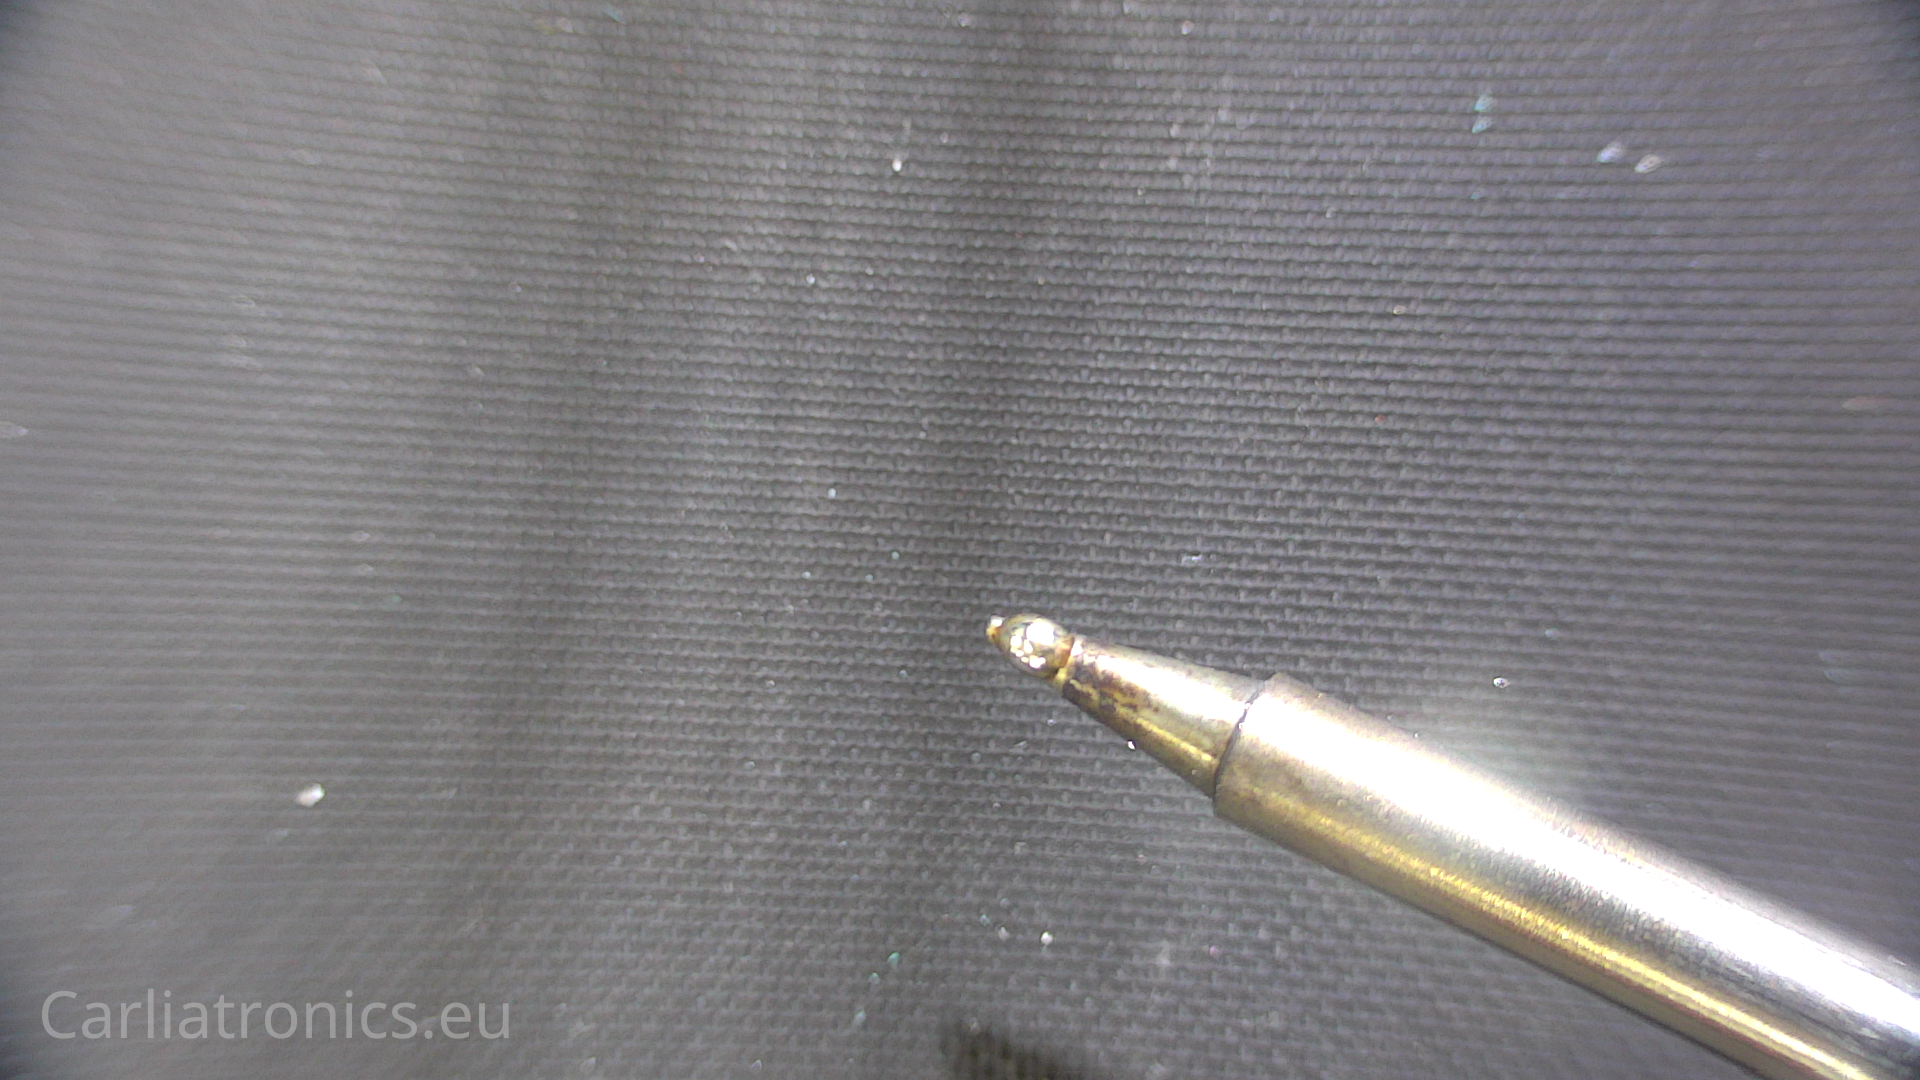
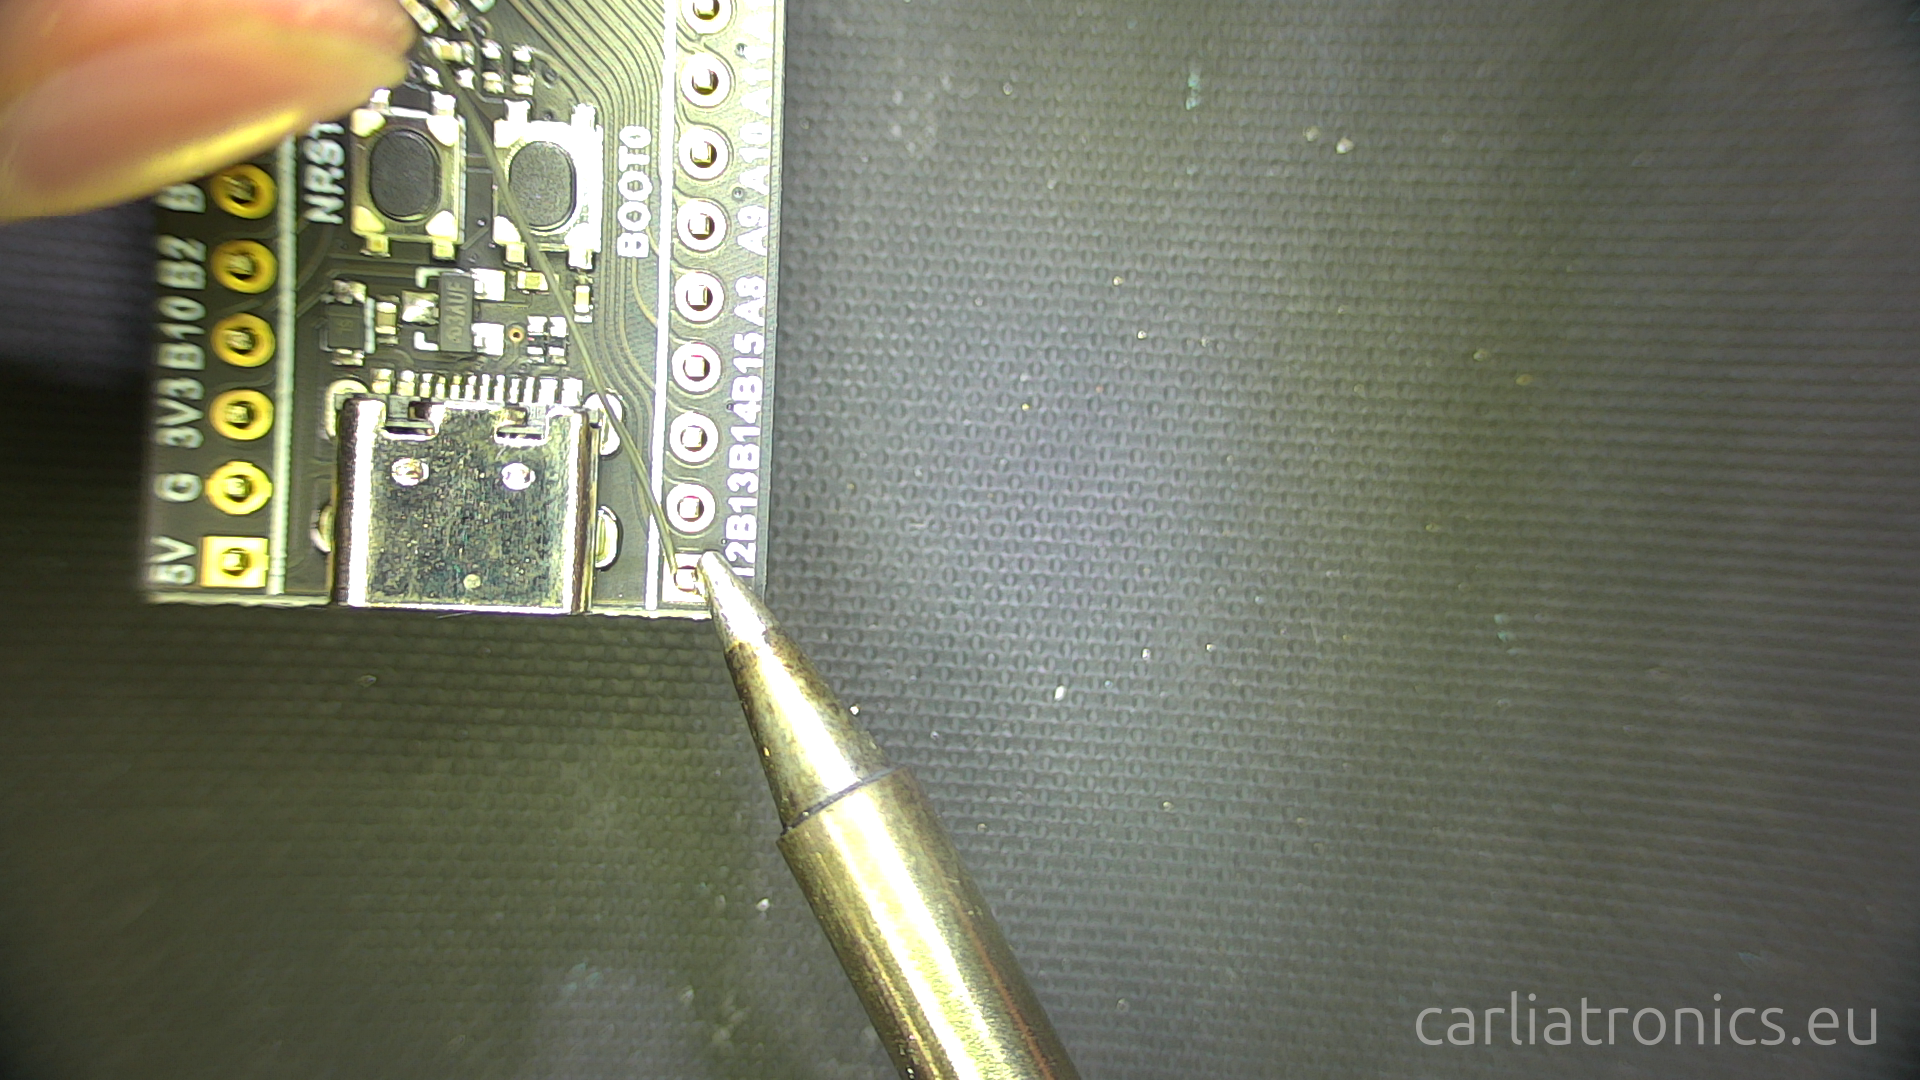
Step 2: Prepare the iron
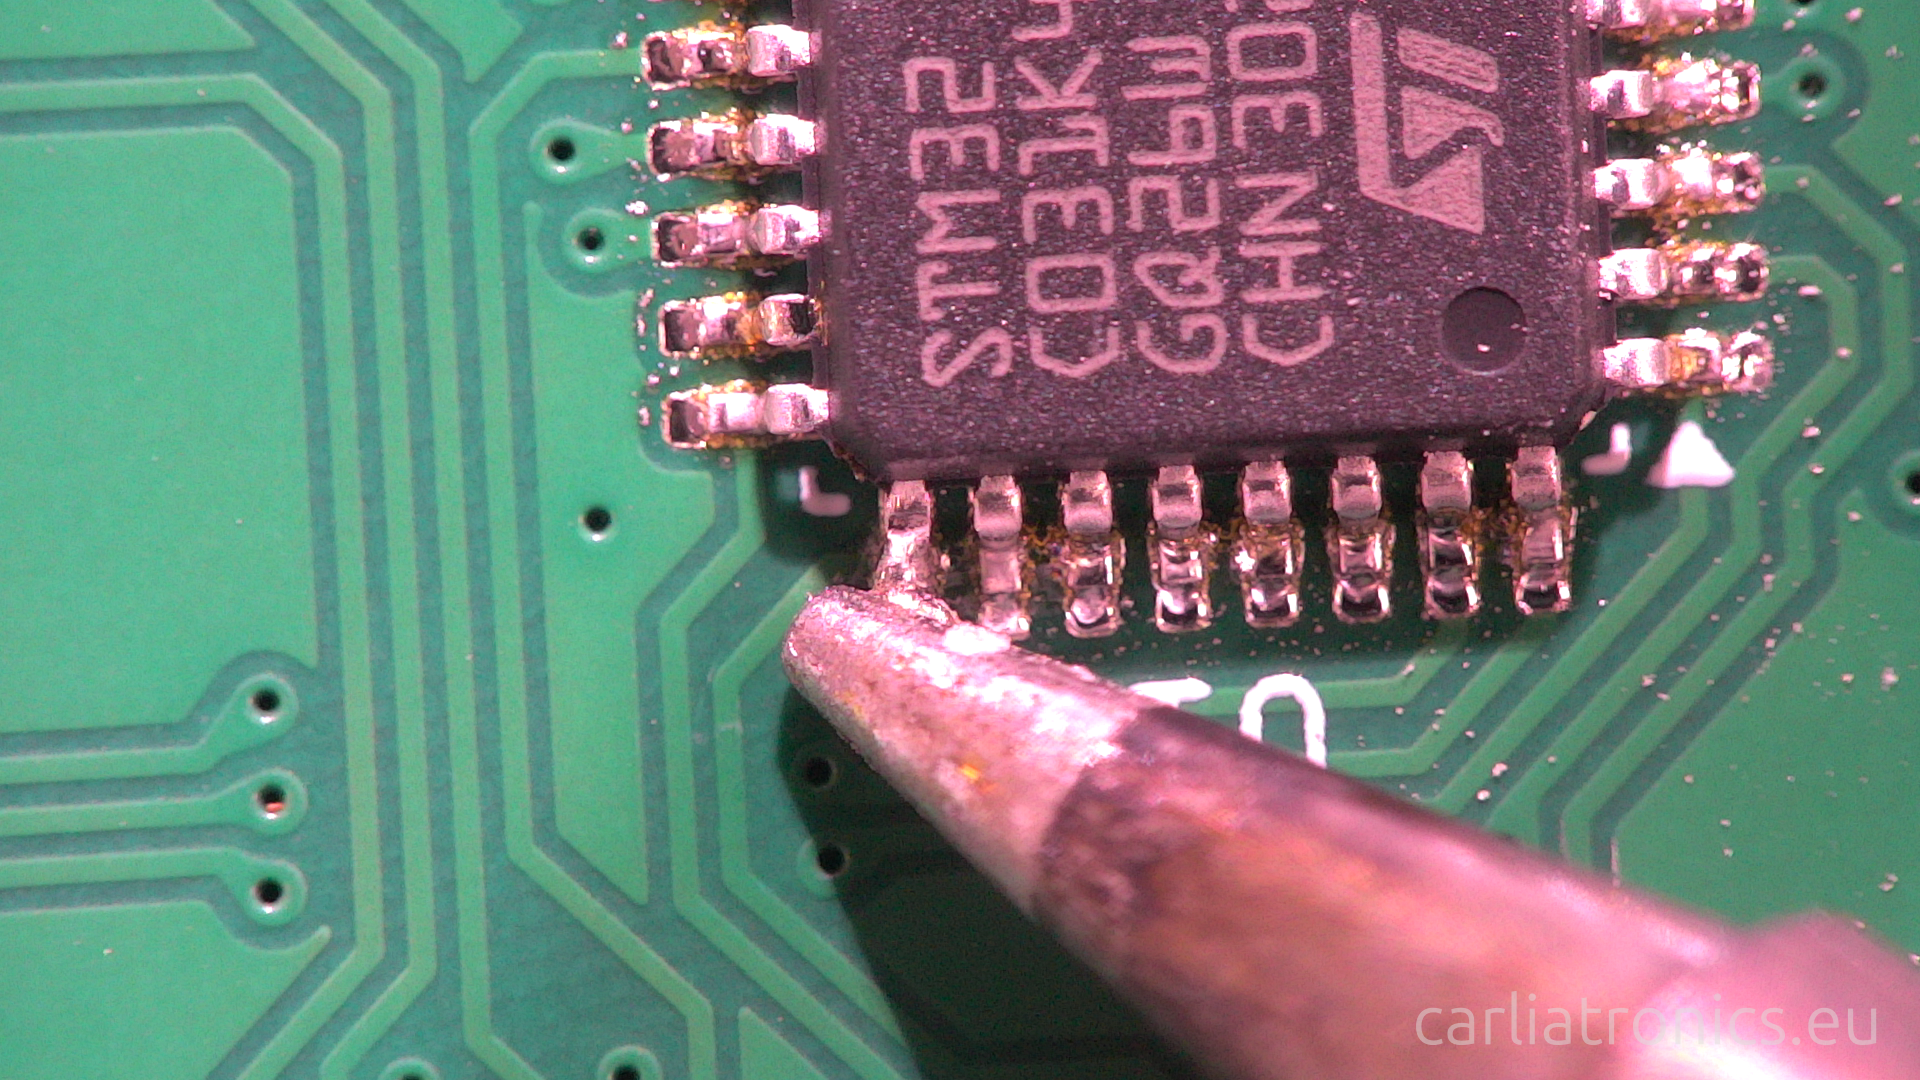
Heat the iron until it is maybe 30-50C above the melting point of the solder. If you can't see the temperature simply try to melt the wire on the tip periodically. Once it is hot add a small amount of solder on the tip. It should be covered with a thin layer and the beginning of droplet on it. See image. Clean the tip and reapply solder if the tip is dirty. I clean it every time by habit. I cannot stress enough how critical this step is. The key mistake beginners make is having a low heat transfer rate by trying to solder with a dry tip. A dry tip will have poor contact with the base metal as the contact area is tiny. The solder bead increases the area by "hugging" the base metal until it locally heats up enough to wet the base metal as well. Once that is done the heating rate increases dramatically as you essentially have a solid metal connection between the iron and base metal. But be careful to not make the bead to large as the solder will flow into the joint until the thickness is somewhat equalised, regardless if that is more solder than you wanted there. The size needed depends somewhat on how "large" the joint you make is, but I rather have less than more as adding extra is way easier than removing it.
Step 3: Start soldering
Once the bead is of a good size, apply the iron to the pad and pin using the melted bead from the last step. Preferably both pin and pad at the same time. Take the wire in your other hand and apply it to the pad on the opposite side from the iron. It is important that you touch a part heated by the iron, not the iron itself. By doing this you make sure the surface is hot enough to let the solder flow before the wire starts melting and this makes it easier to control the amount of solder. Keep adding solder until you have a fillet around the entire pad/pin and remove the iron. The solder should solidify almost instantly. If the header need adjustments you can remelt the solder by touching it with the iron. The rule about adding solder to the opposite side of the pad can be flexed a bit if you discover the bead is to small. Then it is OK to add a small amount to the iron to aid in heat transfer and then add the bulk following the rule.

Solder the rest of the pads. Once you have the technique it should only take a second or two for each pin once the board is getting warm. If it takes longer you are either not doing it correctly or the pin you are soldering is a ground or VCC pin. More about this later
Step 4: Cleaning up
Once you are done you should maintain the tip. Clean it and apply a very thin layer of solder. It might be easier to make the layer thin enough by cleaning the tip, then apply some solder and clean it of quickly again. It is important you apply some solder as the tin serves as corrosion protection when it cools down/is stored. Try to be sure there are no flux residues left as they might be corrosive.
Identify a good or bad joint
Joints need to be inspected after done to make sure they are all good. A bad joint might work today, but unreliably and break tomorrow. It is extremely annoying to debug solder joint issues so make sure your joints are good before you proceed with the project.
The things to look for are
- Wetting
- Shine
- Shorts
Wetting
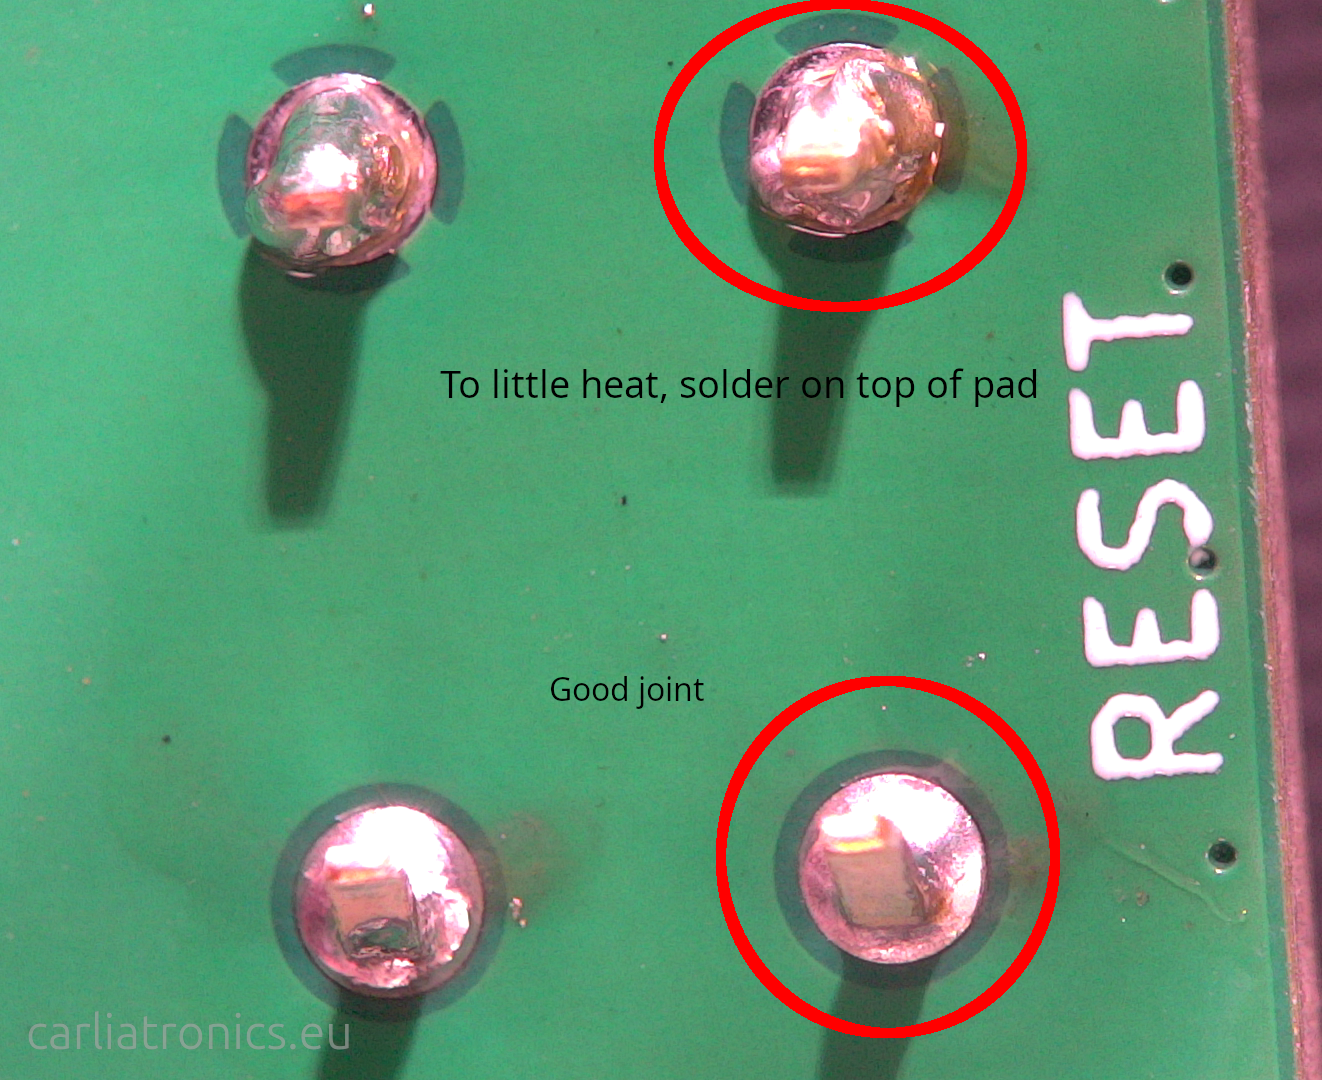
A good joint has clearly "flowed" around all parts and attached to them in a clear way. How to see this is to look for a fillet. The fillet looks like a smooth transition between metal surface and joint. If you have something resting on top of a metal it is most likely a bad joint and need to be fixed.
Shine
A good joint is shiny. A dull surface finish suggest oxidation or a cold joint. It is harded to see with lead free solder as the difference is less.
Shorts
This one is self explanatory. A short is when to pins/pads are connected by a solder bridge. Shorts are most often bad and shall be removed.
What if it does not work?
Solder does not flow
The most likely problem you have is insufficient temperature of the base metals. The naive way to fix this is to crank up the iron temperature but that is not the issue usually. What you experience is insufficient transfer of heat. Read step 2 about a solder bead again. Make sure the tip is just slightly "wet", and that the wet part is touching what you want to heat. Just make sure you do not go overboard as you will probably form shorts.
If it still does not work, your next probable problem is that the flux has been depleted. This can happen if the parts has been heated for an extended amount of time, or that the parts are very dirty/oxidised. Add some more flux and try again.
If none of these things work, you might have a problem with heat dissipation. This is unusual in beginner projects, but can happen if you have a board designed for high power dissipation in a compact form factor. With this I mean something like a graphics card, laptop motherboard, motor drivers or similar parts with high power density. If the board is designed for high power dissipation it will be very good at sucking heat away from the component. How to fix this is outside what I would call "for beginners" so you are better off trying something easier.
You can of course just crank up the heat of the iron as it will help, but try the other things first!
I get shorts everywhere
Your bead is probably to big or you add to much solder when forming the joints. A small short can be removed with the iron. Melt the short, clean the tip of the extra solder and repeat until the short is gone. Larger shorts can easily be removed with solder wick and flux. Add flux to the short, place the wick on top and heat it (remember you need a bead here too!). Don't worry about wicking away to much solder, with enough flux the wick will remove solder but leave as much as is needed to a good joint. Heat until you see solder flowing into the wick, remove and check your progress until done. I will write about a stupid but effective hack for soldering tight spaced leads exploiting method at some time in the future.
My pad let go from the board or my board is disintegrating
This is a common thing to happen for beginners. It is caused by excessive heating. PCBs are made from copper foil bonded to a base, usually epoxy infused glass fibre. This base break down under high heat. It will survive a short time at high temperature but if to long it will char, break down and the foil will let go.
The solution is heat management. Overheating the base is usually a symptom of having to slow heat transfer forcing you to need to heat for extensive times to get solder to flow. If melting takes longer than 10s it is a sign to reconsider you might need to change your process.
Sadly, fixing the board with loose pads is hard. You cannot solder to the base, traces under solder mask or the "edge" of traces. Your only feasible option is to find a exposed pad on the broken trace or carefully remove the solder mask over the trace. Once done, you solder a small wire between the part at the broken pad and the location you identified.